Chapter 10 of 13 · Advanced · 10 min read
Shot Matching: Consistent Color Across Clips
Shot matching is the part of colour grading that makes the clips of one scene look as if they were filmed at the same moment, with the same camera, in the same light. It is the least glamorous job in a grade and the one viewers notice most when it is missing. A face that turns slightly magenta on a cut, or a room that cools between the wide shot and the close-up, breaks the scene even for people who couldn’t say what changed.
This chapter covers four ways to get consistent colour across clips: matching by eye with the scopes, comparing against a reference still with a split wipe, the automatic Match colours tool, and sharing one base grade with Copy grade and Paste grade before trimming each shot. It assumes you can read a parade and a vectorscope (video scopes, chapter 1) and balance a single shot (white balance, colour wheels).
If you only need to point one clip at a reference and export, the colour match tool is the quicker page. This one is about the craft around it: what to match, in what order, and how to finish what the automatic match leaves behind.
Video guide
How to Match Shots in Color Grading: Two Cameras, One Look
Chapters
Why a cut shows every difference
Within a single shot your eyes adapt. Watch a slightly warm clip for a few seconds and your visual system quietly treats its white as white, the same way a room lit by bulbs stops looking orange once you have been in it a while. A cut removes that grace period. The new frame is compared directly with the memory of the last one, so differences that would pass unnoticed in isolation, a little more green in the shadows or a quarter of a stop in level, suddenly read as a change in the world.
Viewers notice skin first, then large neutral surfaces such as walls, shirts and skies, then overall contrast. A mismatch in the colour of a lamp in the background matters far less than the same mismatch on a face.
Where mismatches come from
- Different cameras, or the same camera with a different picture profile: each maker renders colour and contrast its own way.
- Automatic white balance and automatic exposure drifting as the framing changes.
- Changing light: the sun moving, clouds passing, a practical lamp in one angle but not the other.
- Lenses and filters: some lenses are warmer than others, and a variable ND filter can add a cast at strong settings.
- Different exposure levels, which change apparent saturation and contrast as well as level.
What matched actually means
Matched does not mean identical numbers. Two angles of a scene have different content, so their scopes will never be the same shape. The goal is that the shared things agree: the same black level and the same white, skin with the same hue and similar saturation, and neutral surfaces equally neutral. Within a scene, shots should be consistent; between scenes, differences should be deliberate.
 (enlarge image)
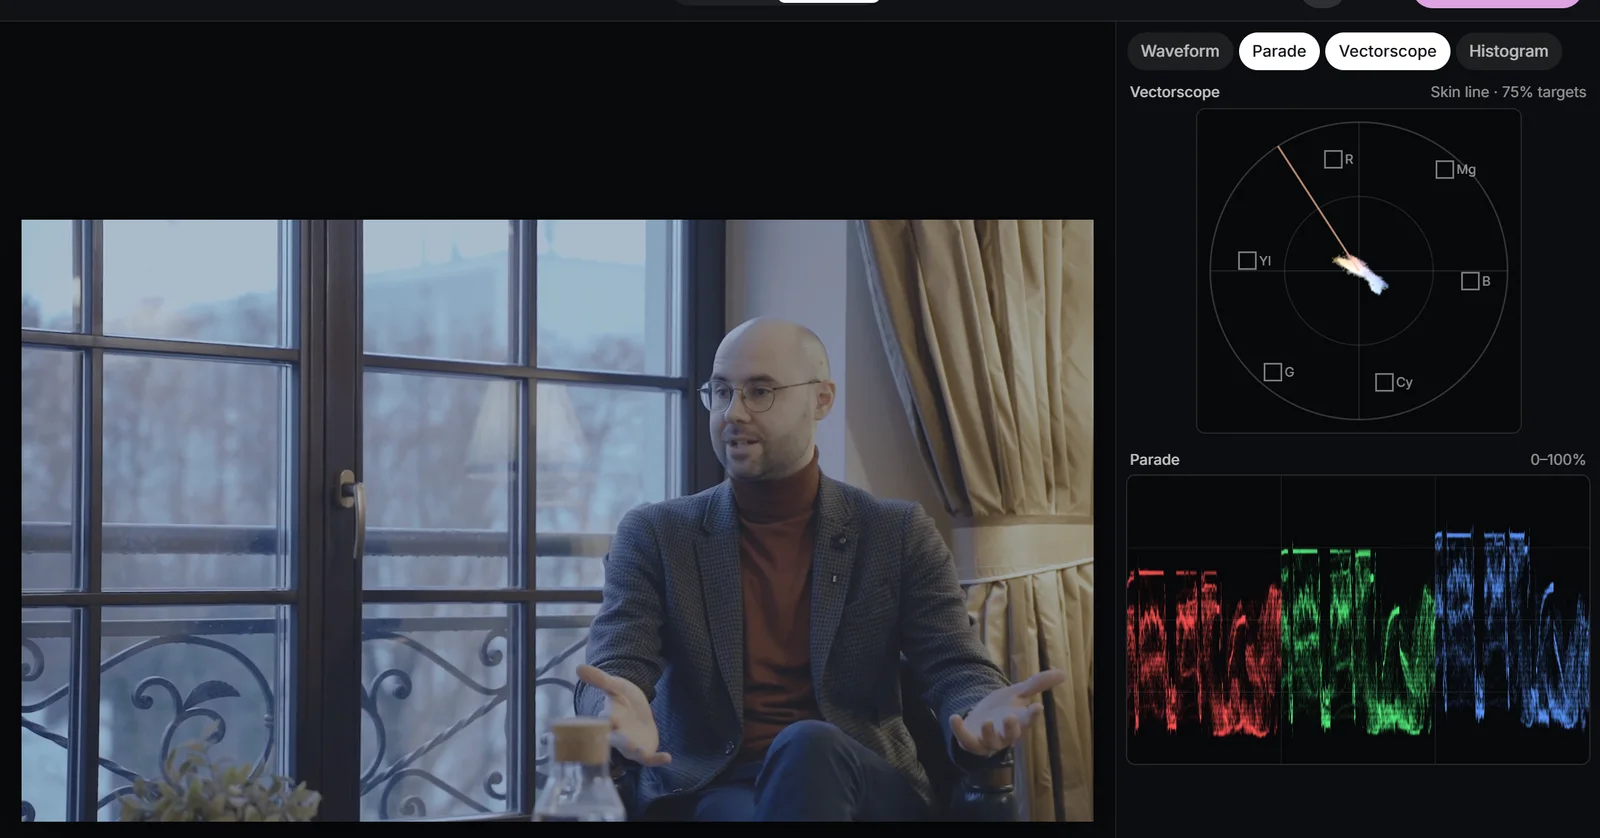
Camera B before matching: the Parade and Vectorscope show how it differs from camera A.
Matching by eye with the scopes
Choose a hero shot
Pick the shot that is best exposed, best lit, or used most in the edit, usually the main wide or the main interview angle. Grade it first, then match every other shot to it. Matching shots to each other in a chain lets small errors pile up, so that the fifth shot ends up a long way from the first.
Work in this order
- Levels. On the Waveform, line up the black point and the white point first, then the level of the main subject. Colour judgements are unreliable while the levels still differ.
- Black balance. On the Parade, the bottom of the red, green and blue traces should sit at the same height in the same neutral shadow in both shots. Correct a mismatch with Lift in Wheels.
- White balance. Compare the tops of the traces on a neutral highlight, such as a white shirt or a lit wall, and correct with Gain, Temperature or Tint.
- Skin and midtones. On the Vectorscope, the skin trace in both shots should point along the skin tone line at a similar distance from the centre. Gamma moves the midtone colour.
- Saturation. Compare the overall spread of the vectorscope trace and bring it into line with Saturation, Vibrance or Colour boost.
Reading the parade between two shots
The parade only tells you about neutrality where the subject really is neutral. A red sofa will always have a tall red trace. Find something the two shots share, such as the same grey wall or the same black jacket, note where it falls in each channel on the hero shot, and bring the other shot’s channels to the same heights. Compare like with like: the jacket in the wide against the jacket in the close-up, not the jacket against the sky.
Reading the vectorscope spread
The direction of the trace’s centre tells you about an overall cast; its length tells you about saturation. If the second shot’s trace leans further towards blue, it is cooler. If its whole trace is shorter, it is less saturated. If only the skin lobe points to a different angle, skin hue differs, which is the mismatch most worth fixing.
Comparing against a reference still
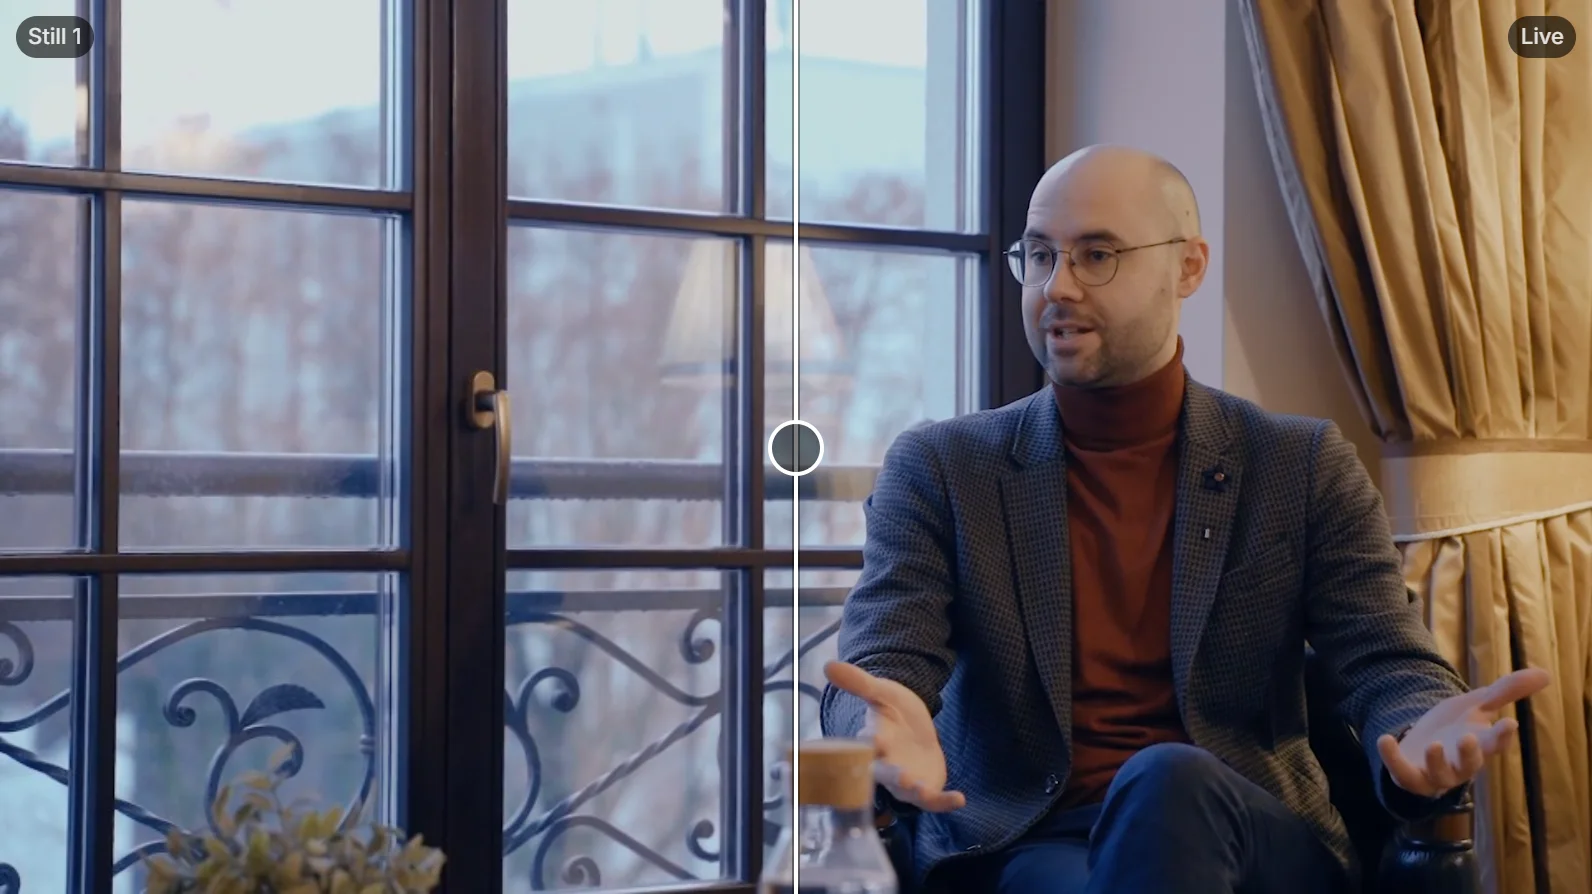
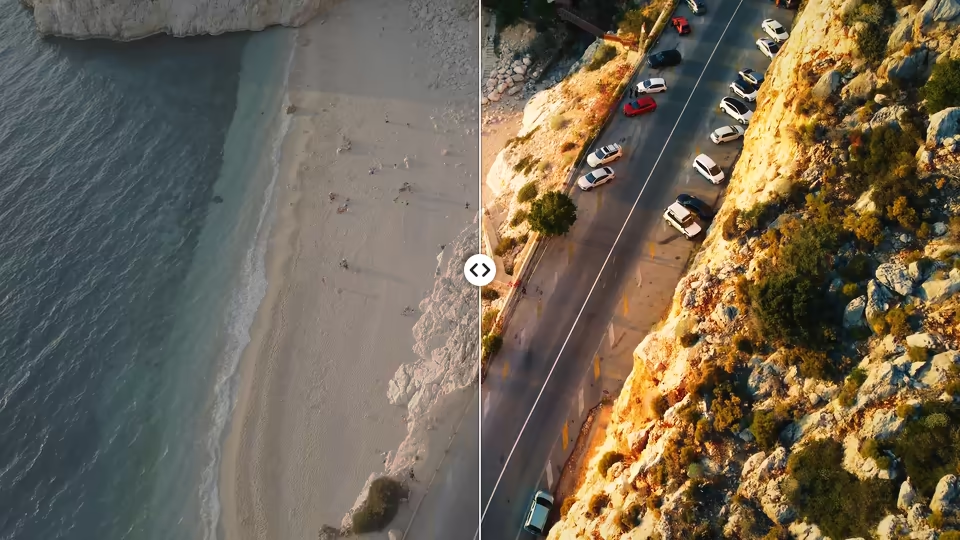
Scopes measure, but you still need to see both shots together. In Pro mode, open the Match panel on the hero shot and choose Grab still (G). It saves the current graded frame and its grade into the Stills gallery for this session. Open the next clip, click the still and choose Show as reference: the stage shows a split wipe with the still on one side and the live picture on the other.
Drag the wipe across the things that matter: through a face, across the horizon, along a wall the two shots share. Your eye is very good at spotting a difference at a hard edge between two images, much better than when comparing two pictures side by side.
Choosing the frames to compare
- Grab the still close to the cut point, where the audience will actually see the two shots meet.
- Use frames with similar content: a close-up to compare against a close-up, a wide against a wide.
- Grab a fresh still once the hero shot is final, so you are not matching to an old version.
If the still comes from a shot filmed with the same camera, settings and light, Apply its grade copies its grade across directly, and you may not need to match at all.
 (enlarge image)
Show as reference wipes between the still of camera A and the live camera B.
Automatic matching with Match colours
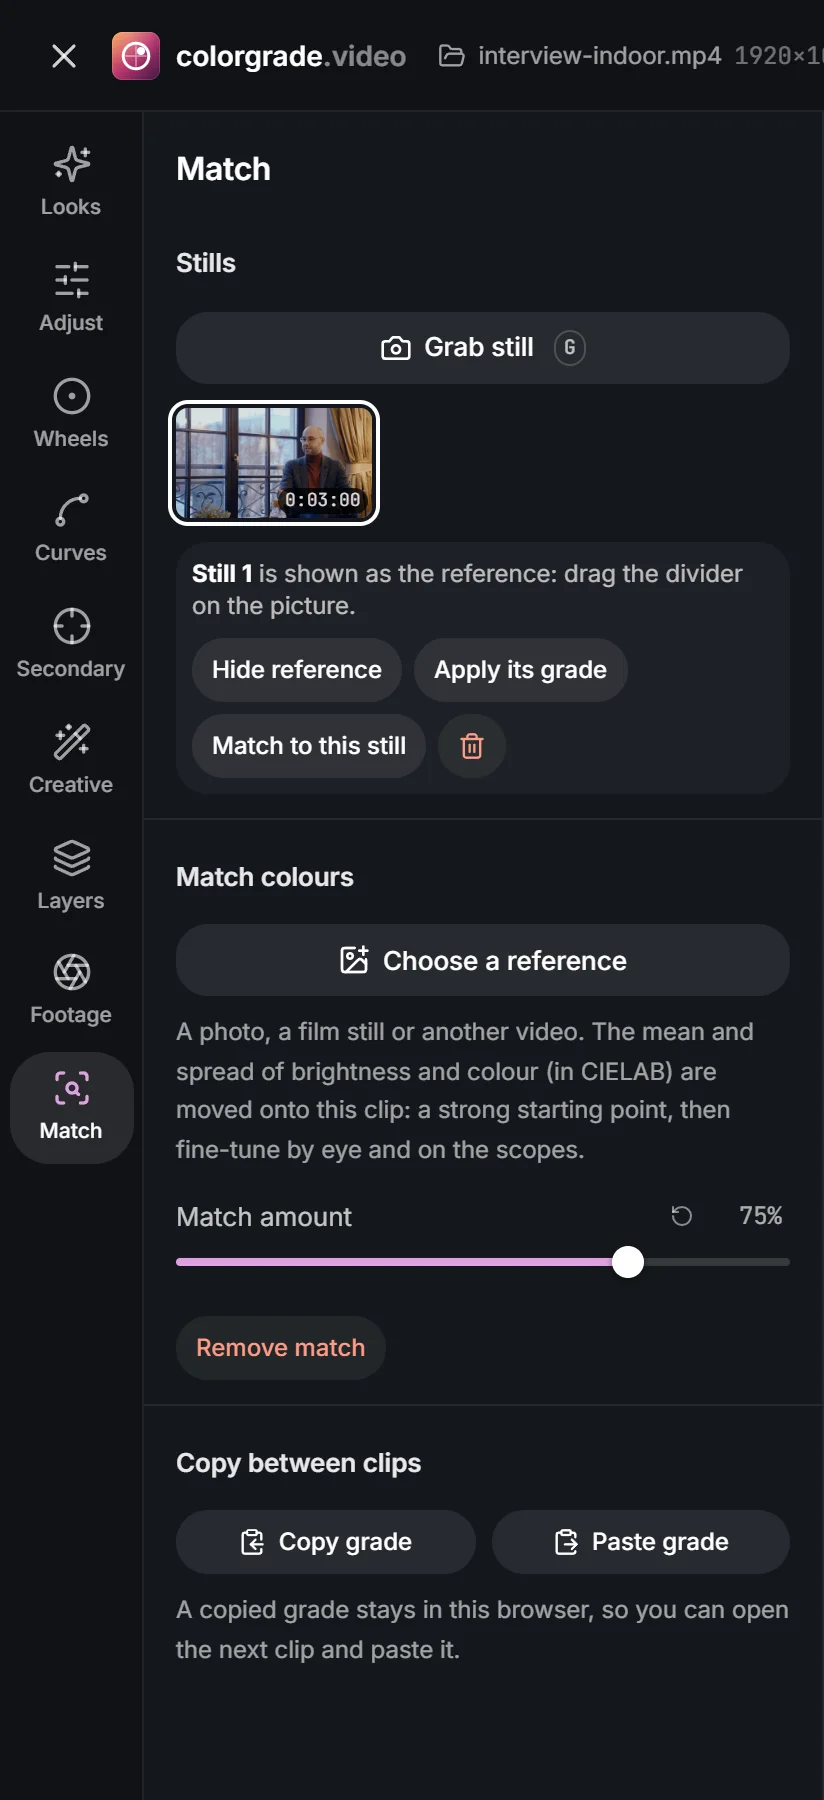
The Match panel can do the first pass for you. Click a still and choose Match to this still, or use Match colours with Choose a reference to pick an image or a frame of another video. Match amount sets how far the shot moves, and Remove match takes it off again.
The method is a statistical transfer in CIELAB, a colour space with a lightness channel (L) and two colour channels (a, green to magenta; b, blue to yellow). For each channel it measures the average and the spread of values in both pictures, then shifts and stretches your shot so its averages and spreads line up with the reference’s. The colour match page goes into the maths and into choosing references.
What it does well
- Removes an overall cast, because the average of a and b moves to the reference’s.
- Brings overall contrast into line, by matching the spread of L.
- Makes the shot as colourful or as restrained as the reference, by matching the spread of a and b.
What it can’t do
- Tell content from light. A frame full of green trees and a frame full of blue sky have different averages because of what is in them, so the match may tint one towards the other.
- Work by region. It is one correction for the whole frame, so it cannot warm the faces and cool the background separately.
- Change the shape of a curve. A shift and stretch cannot copy how one camera rolls off its highlights or lifts its shadows differently from another.
- Fix one hue. If camera B renders greens more yellow but everything else correctly, a whole-frame transfer can’t isolate that.
- Recover detail that is clipped in the shot, or know that a face is a face.
So use it as a starting point. When the content of the two frames differs, lower Match amount to somewhere between half and three-quarters, then finish with the scope-led order from the previous section. A hue difference such as the yellow greens belongs in secondary colour correction with Hue vs Hue.
 (enlarge image)
The Match panel: Stills, Match colours and Copy grade / Paste grade.
A base grade, then per-shot trims
On a real project you rarely grade each shot from scratch. You build one grade on the hero shot, share it across the scene, then make small per-shot corrections, called trims, that bring each shot in line. The creative look stays identical everywhere, and only the trims differ.
- Grade the hero shot: correction on the Correction layer, the look on the Look layer.
- Choose Copy grade (Shift+C).
- Open the next shot of the scene and choose Paste grade (Shift+V).
- In Layers, choose Add layer and rename it Trim. Added layers sit between Correction and Look, so the trim works under the look.
- With Trim selected, match the shot to the hero still with Show as reference and the scopes.
The layer order is what makes this work. Because the stack is serial, a trim before the look changes what the look receives, exactly as if the shot had been filmed a little differently. Put the same trim after the look and you would be correcting the look itself, which is much harder to keep consistent from shot to shot. The workflow chapter covers the stack in detail.
The same idea in other editors
DaVinci Resolve does this with groups: a pre-clip or post-clip grade shared by every shot in the group, plus each clip’s own nodes for its trim. In Premiere Pro, a common approach is an adjustment layer carrying the look over the whole scene, with a Lumetri Color effect on each clip for its trim. Our Resolve and Premiere Pro guides show where those controls are.
 (enlarge image)
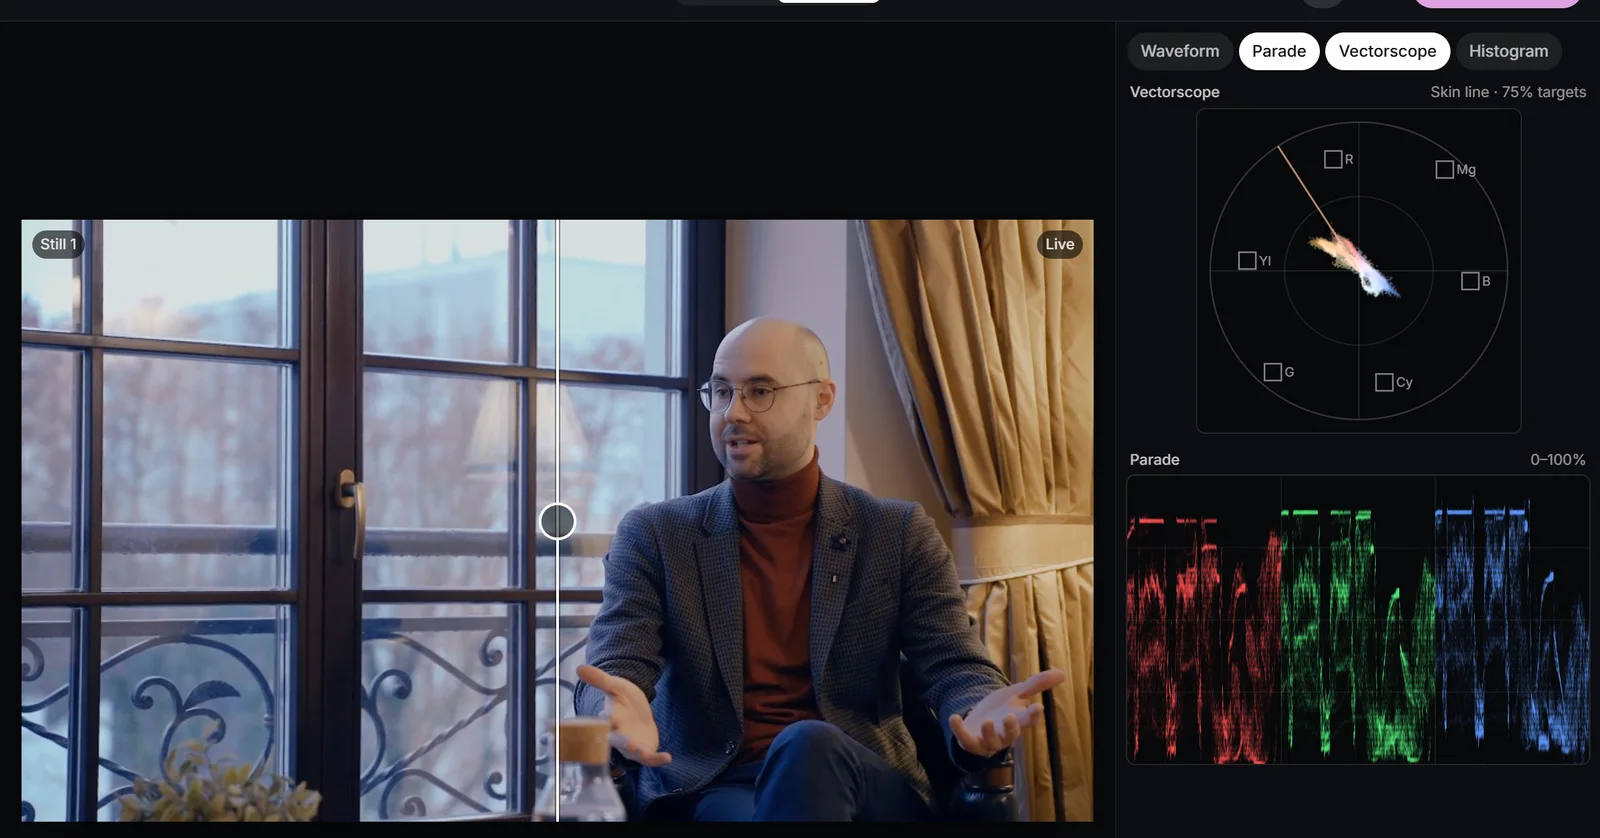
After the match and a small trim, camera B’s scopes line up with camera A’s.
Matching to a photo or a film still
Matching is not only for cameras at the same shoot. Choose a reference accepts any image, so a photograph from a location recce, a still from a film you admire or a frame from a brand’s previous campaign can become the target for a whole scene.
- Pick a reference with similar content and light: a sunset portrait for a sunset portrait, not a neon street.
- Crop black bars, captions and logos out of the image first; they join the statistics and drag the result.
- Expect the balance, contrast and colourfulness of the reference, not its exact grade. A colourist’s secondaries and windows can’t be recovered from one frame.
- Start around half Match amount, correct skin with the Vectorscope, then keep the result consistent across the scene with Copy grade and Paste grade.
Use stylised references with care. A heavily graded still pushes ordinary footage hard, and the result often looks like a filter rather than a decision. If what you really want is the mood of the reference, the creative looks chapter shows how to build it deliberately.
Try it: match two cameras of one interview
Match a second camera angle to a hero shot with a reference still, the automatic match and a few hand trims, watching the parade and vectorscope.
- 1
Open and correct the hero shot
Open the main angle, switch to Pro and set the scopes to Parade and Vectorscope. Balance it in Adjust until neutrals are neutral and skin sits on the skin tone line.
- 2
Grab a still
Open the Match panel and choose Grab still (G) on a frame near the cut point.
- 3
Open the second angle and compare
Open the other clip, click the still in Stills and choose Show as reference. Drag the wipe across the face.
- 4
Run the automatic match
Choose Match to this still, then set Match amount so the two angles look like neighbours without overshooting.
- 5
Trim by hand
Line up the bottoms and tops of the Parade traces with Lift and Gain, then bring skin onto the same angle on the Vectorscope with Temperature and Tint.
- 6
Check at the cut
Turn the reference off, play across the edit point in your editor or compare the two exports, and fix anything that still jumps.
Drop a video or photo to colour gradeChoose a video or photo to grade
Opens in the studio: looks and Auto colour for a quick result, wheels, curves, masks and scopes when you want more.It opens in the studio on your phone. Nothing is uploaded.
MP4, MOV, WebM, MKV, JPG, PNG, WebP
Free · no watermark · graded on your device, never uploaded