
Free · runs in your browser

VHS Filter for Video

Real tape emulation, not just a colour preset: smeared colour, soft lines, tracking wobble, head-switching noise and a ticking camcorder date stamp, previewed on your clip and exported as MP4.

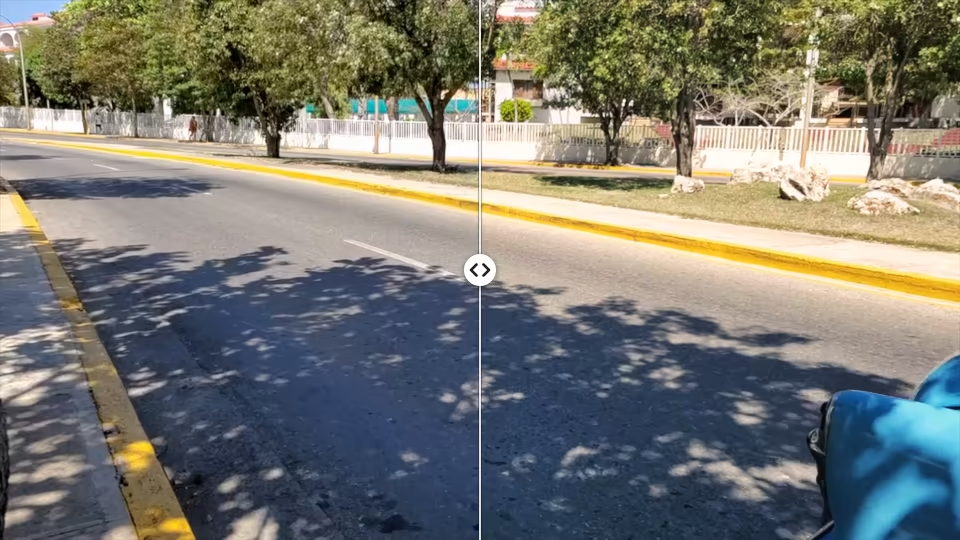
A turquoise vintage car on a sunny tree-lined street, split down the middle: the original clip on the left and the same shot with a film-stock look on the right.

Drop a video or photo to colour gradeChoose a video or photo to grade

Opens in the studio: looks and Auto colour for a quick result, wheels, curves, masks and scopes when you want more.It opens in the studio on your phone. Nothing is uploaded.

MP4, MOV, WebM, MKV, JPG, PNG, WebP

Free · no watermark · graded on your device, never uploaded

To make a video look like VHS, soften the picture sideways, blur and smear the colour much more than the brightness, add line jitter and noise, darken every other line, and frame it 4:3. Open a clip above and the studio starts with the VHS look, which does all of that at once; the picture moves like tape because every flicker is tied to the video’s own time. The VHS & tape chip in All looks holds eight more, from the light Clean Deck to Worn Tape with dropouts and a rolling crease.

Each part of the effect has its own slider in the VHS tape section of the Creative panel, and Date stamp burns in a camcorder clock that ticks as the video plays. Everything runs in your browser and the clip never leaves your device. If you only want the faded colour of the period without tape damage, the vintage video filter is the gentler option, and the film look covers grain and halation from celluloid rather than tape.

Video guide

VHS Filter for Video: Tape Looks, Tracking and a Date Stamp

Duration:

How to add a VHS filter to a video

  1. Open your clip

    Choose Open video or photo (Ctrl/Cmd+O) or drop a file on the page. The studio opens with the VHS look applied, so you see the tape effect on your own footage straight away.

  2. Pick a tape look

    The quick picks switch to the tape looks: try Camcorder 1995 for a home video with a date stamp, Rental Copy for a softer, dubbed tape or Tracking Error for a damaged one. Intensity scales the whole effect.

  3. Tune the tape

    Open Creative and the VHS tape section: raise Colour bleed, Tracking or Tape noise, switch 4:3 frame on or off, and press New tape to move the jitter and dropouts somewhere else.

  4. Add the date stamp

    In Date stamp, set Show to Date, Time or Both, then choose the Date, Start time, Position and Colour. On-screen text adds PLAY ▶ or a blinking ● REC.

  5. Export the video

    Choose Export (Ctrl/Cmd+Enter), then Export video. Every frame is rebuilt on your device with the same tape pattern you saw in the preview, and Download video saves the MP4.

What makes footage look like VHS

VHS has a recognisable look because of how a home video recorder stored the picture. Each trait below is a consequence of the format, and each has its own control in the VHS tape section.

Soft detail: about 240 lines across the picture

A VHS recorder kept roughly 240 lines of horizontal detail per picture height, against well over a thousand in a modern 1080p file. Fine texture such as hair, foliage and text blurs sideways, while vertical detail is limited by the 480 or so visible lines of the TV picture. Softness filters the brightness along each line and snaps the picture to 480 tape lines, then adds the faint bright halo that a recorder’s sharpening circuit left beside edges.

Colour bleed: colour recorded at a fraction of the detail

VHS records colour separately from brightness, on a low-frequency carrier with only a few hundred kilohertz of bandwidth, roughly a sixth of what brightness gets. Colour therefore spreads well past the edges of objects and trails to the right of them, which is why a red jumper on tape seems to glow beyond its outline. Colour bleed blurs the colour signal far more than the brightness and smears it rightwards with an exponential tail, the same direction as a real recorder.

Head-switching noise and tracking

The tape is read by heads on a spinning drum, and the playback switches from one head to the other a few lines before the end of each field. On a CRT that ragged band was hidden by overscan; in a digital transfer it shows as a torn, noisy strip along the bottom of the frame. Head-switching noise recreates it. When the heads don’t follow the recorded tracks precisely, lines wobble sideways, a band of noise rolls through the picture and the frame occasionally drops a line; Tracking does all three, more of each as you raise it.

Scanlines, noise, dropouts and creases

Scanlines darkens every other tape line and nudges odd and even lines apart, like the two fields of an interlaced picture. Tape noise adds the horizontally stretched grain and blotchy colour noise of a weak signal. Dropouts are short white streaks where the magnetic coating was damaged or dusty, and Tape crease sends a band of distortion through the frame every few seconds, as a crinkled stretch of tape passes the heads.

The 4:3 frame

Almost everything recorded on VHS was 4:3. 4:3 frame keeps the centre of your picture and puts black bars at the sides of a widescreen clip (or above and below a tall phone video). The file keeps its original shape, so it still fits the platform you post to; the effect, the noise and the date stamp all sit inside the 4:3 picture.
Camcorder date stamp

Many home camcorders could burn the date and time from their own clock into the recording, usually in a bottom corner in blocky white or amber characters. Date stamp draws the same kind of dot-matrix text, and because it is added before the tape effects, it bleeds, jitters and catches the noise like the rest of the picture instead of floating on top.

  • Show: Date, Time or Both. The clock starts at Start time and runs with the video, so the seconds tick during playback and in the export.
  • Date style: JUN. 14 1996, 14.06.1996 or 1996.06.14. Clock: 12-hour (shown as AM or PM) or 24-hour.
  • Position: any corner. Colour: White or Amber.
  • On-screen text: PLAY ▶ in the top corner like a VCR’s display, or ● REC with a blinking dot like a camcorder viewfinder.

The stamp is one setting for the whole grade, so it stays when you try another look. Camcorder 1995 and Holiday Tape switch it on for you if it is off.

VHS, Video8, MiniDV or film?

“Old home video” covers several formats, and they don’t look alike. Choosing the right one makes the result more convincing.

  • VHS and VHS-C (1980s to early 2000s): the softest of the lot, with strong colour bleed, noise and tracking faults. Use VHS, Rental Copy or Worn Tape.
  • Video8 and Hi8 camcorders: similar tape artefacts, but Hi8 holds noticeably more detail. Use Camcorder 1995 and lower Softness, or start from Clean Deck.
  • MiniDV and early digital camcorders (from the mid-1990s): sharp, clean and digital, with no colour bleed. A cool, contrasty colour grade such as Early Digicam in the Vintage chip fits better than any tape effect.
  • Super 8 and 8 mm film: grain, warm faded colour and a soft vignette, but no scanlines. That is Home Movie 8mm on the vintage video filter page.

On iPhone, Android and photos

There’s nothing to install: the page works in Safari and Chrome on a phone, with the panels in a bar along the bottom. A phone renders every frame itself, so a long 4K clip takes a while to export; choose a smaller Size in Export for a quicker, softer file, which suits the VHS look anyway. Use Share to send the result to your photo library.

Photos open too. A VHS effect on a JPG, PNG or WebP image exports as a still with the same softness, colour bleed and date stamp, which is a quick way to make a tape-style cover image for a video.

What it doesn’t do

  • Sound is passed through untouched: there is no tape hiss, wow or flutter.
  • Scanlines and the field offset are drawn on each frame; the clip isn’t converted to interlaced video, and the frame rate stays the same.
  • It is an emulation built from the traits above, not a simulation of the full analogue signal, so extreme settings look stylised rather than like a specific recorder.
  • A LUT can’t carry any of it: Export .cube saves only the colour of a tape look, not the bleed, noise or stamp.

VHS filter questions

How do I make a video look like VHS?

Open it above: the studio applies the VHS look, which softens detail, smears the colour, adds tracking jitter, head-switching noise and scanlines, and frames the picture 4:3. Adjust any of them in Creative > VHS tape, then choose Export and Export video.

Is there a free VHS filter for iPhone?

Yes, this one runs in Safari on an iPhone with no app and no account. Open the video from your library, pick a tape look, then Export and Share it back to Photos. Nothing is uploaded.

How do I add a VHS date stamp to a video?

Open Creative, then Date stamp, and set Show to Date or Both. Type the Date and Start time you want; the clock runs from there as the video plays. Camcorder 1995 turns the stamp on for you.

Can I add a VHS effect to a photo?

Yes. Open a JPG, PNG or WebP image instead of a video, choose a tape look and export a still. The date stamp shows the start time you set, since a photo has no running clock.

Will the exported video look the same as the preview?

Yes. Every random part of the effect, from the line jitter to the dropouts, is worked out from the video’s own time and a seed, so the export repeats the preview frame for frame. New tape picks a different seed.

What is the difference between the VHS filter and the vintage filter?

The vintage filter changes colour and adds grain: faded blacks, warm or drifted colour, a vignette. The VHS filter rebuilds the picture as tape would carry it, with smeared colour, softness, tracking faults and scanlines, on top of a tape-like colour response.

How do I get rid of the black bars?

Switch 4:3 frame off in Creative > VHS tape. The tape effects then cover the whole frame at its original shape.