Chapter 4 of 13 · Intermediate · 7 min read
Lift, Gamma, Gain and Offset: The Color Wheels
The colour wheels are the primary grading tool in every professional app, and they look more mysterious than they are. Each of the four, Lift, Gamma, Gain and Offset, is one simple operation on the red, green and blue values of every pixel. Once you know the operation, you can predict what a wheel will do to the waveform before you touch it, and choose the right one instead of trying all four.
This chapter explains the maths in plain words, the difference between a wheel’s master ring and its colour puck, the Log wheels and when they beat the primaries, and the primary bars beneath the wheels. The demos use chart-scene, because its grey wedge shows exactly which tones each wheel moves. It assumes you can read the waveform and parade.
Video guide
Lift, Gamma, Gain and Offset: Color Wheels on the Waveform
Chapters
The four wheels in plain words
Think of each channel’s value as running from 0 (black) to 1 (white). Every wheel changes that value with one formula, applied separately to red, green and blue:
| Wheel | Operation | Moves most | Leaves alone | Typical use |
|---|---|---|---|---|
| Lift | Adds an amount at black that fades to zero at white | Blacks | White | Shadow level and shadow colour |
| Gamma | Raises the value to a power (a curve) | Midtones | Black and white | Midtone level, skin and overall colour |
| Gain | Multiplies the value | Whites | Black | White level and the colour of the light |
| Offset | Adds the same amount everywhere | Everything equally | Nothing | Overall balance, flare and haze casts |
On the Waveform, each has a recognisable signature. Lift pivots the trace around its top: raise it and the bottom climbs while white stays put, so the image looks lighter and flatter. Gain pivots around the bottom: lower it and the top comes down while black stays anchored. Gamma bows the middle of the trace up or down with both ends fixed, the gentlest way to make a shot lighter or heavier. Offset slides the whole trace up or down, which moves black off zero, so it usually needs a Lift or Blacks correction afterwards.
 (enlarge image)
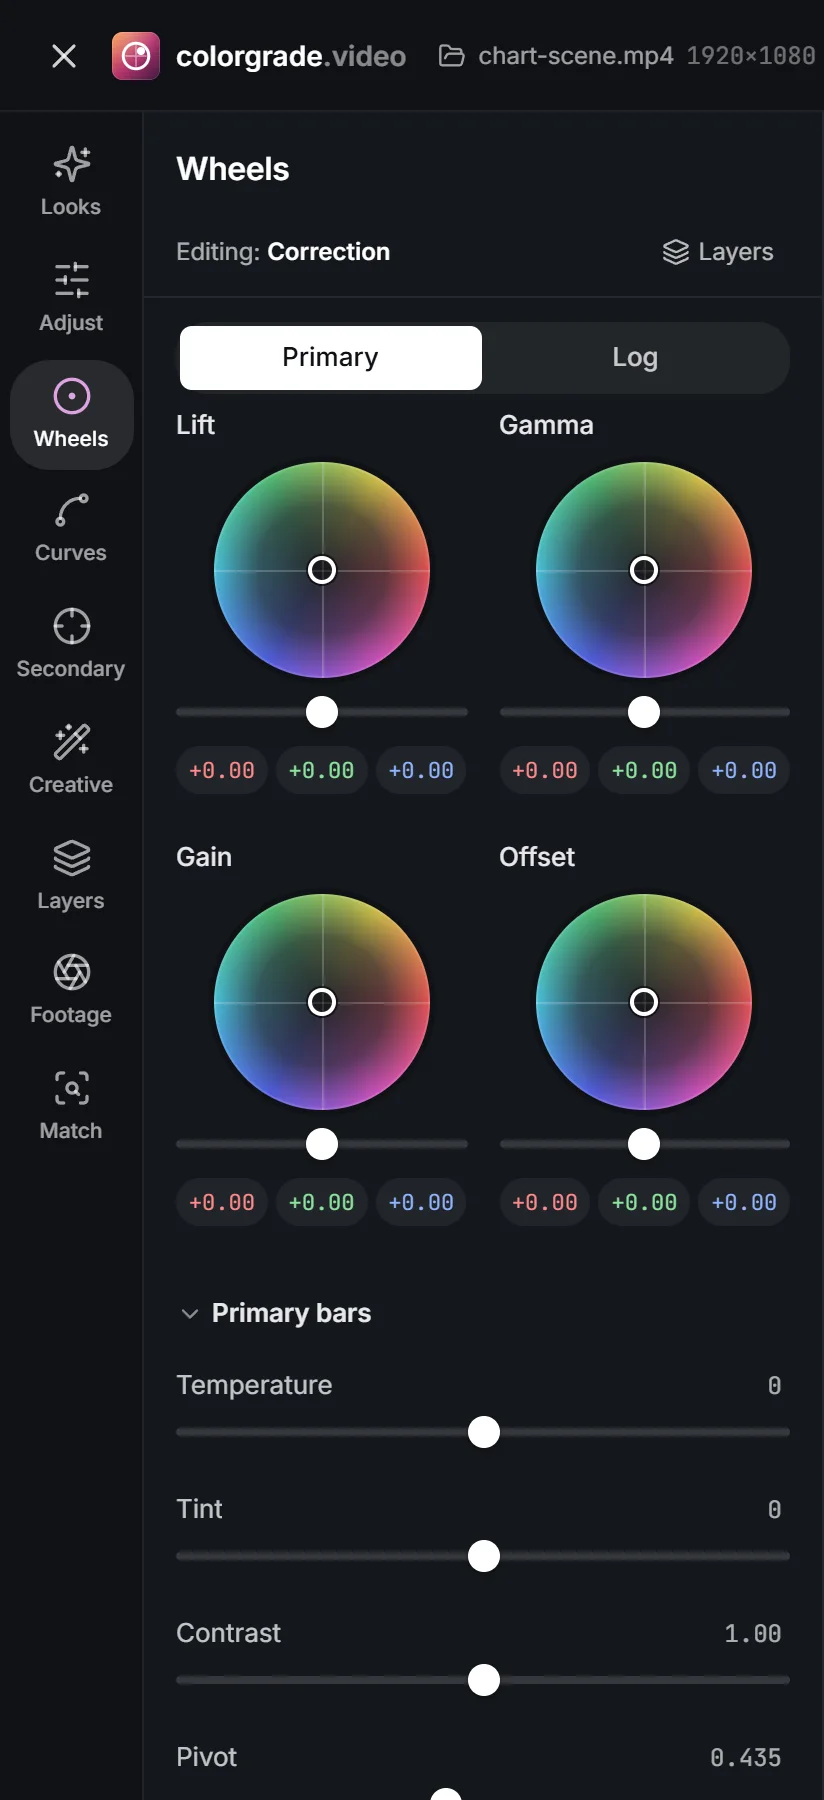
The Primary wheels with their master rings, R, G, B fields and the bars below.
The order you move them in doesn’t matter: the studio always applies them in the same sequence, after the Adjust controls. What matters is choosing the wheel whose “leaves alone” column protects the tones you have already set.
Master ring, colour puck and the R, G, B values
Each wheel has two parts. The master ring (the level slider under the wheel) moves all three channels together, changing level without changing colour. The puck in the middle changes colour: drag it towards a hue and the channels on that side of the colour circle rise while the opposite ones fall, keeping overall level roughly the same. Dragging the Gain puck towards orange raises red and lowers blue in the lightest tones; dragging the Lift puck towards teal adds blue and green to the shadows and takes out red.
Under each wheel, the R, G and B fields show the per-channel values the wheel is producing. They are the honest version of the puck: a small-looking drag might be adding 0.04 to blue and subtracting 0.03 from red. You can type into them for exact, repeatable moves, or to change one channel alone, which the puck can’t do.
How far to push
- For correction, a few percent of the wheel’s radius is usually enough. If the puck is near the edge, the problem is probably better solved by Pick white or the right wheel.
- Move the puck with the keyboard for fine control, and double-click a wheel to reset it.
- Judge on the Parade, not the picture: a creative push that looks subtle on a bright screen can be far stronger than intended.
Balancing a shot with the wheels
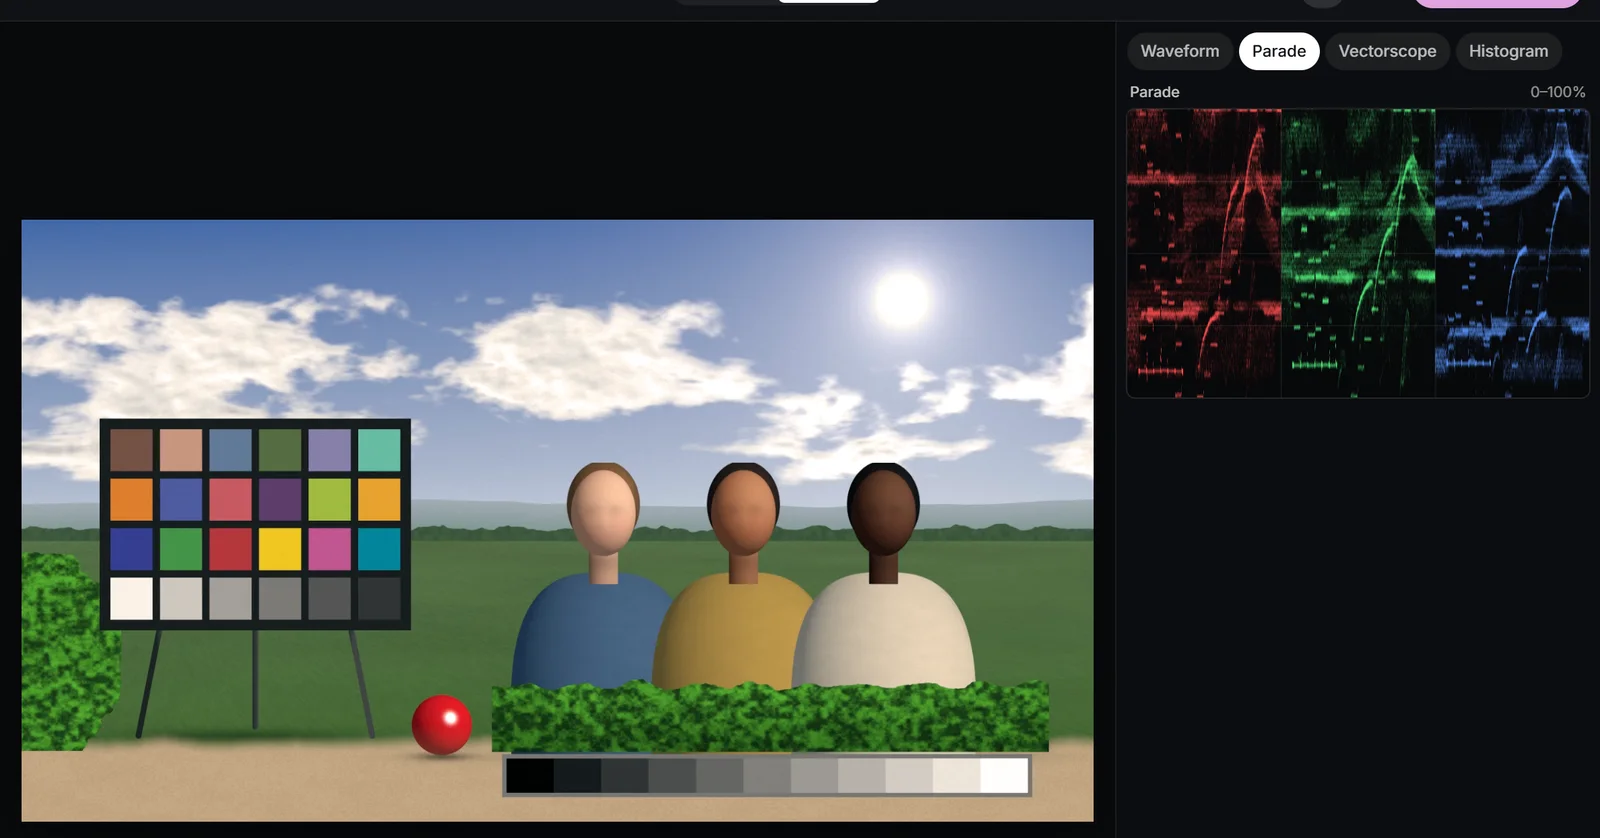
The parade tells you which wheel to use. Look at the traces over something neutral, ideally the grey wedge or a grey card, and see where the channels separate:
- Separated at the top only: the colour of the light. Use Gain (or Temperature and Tint).
- Separated by the same amount at every level: colour added on top, from flare, haze or a poor conversion. Use Offset.
- Separated at the bottom only: tinted blacks, common with cheap sensors or some LUTs. Use Lift.
- Separated mostly in the middle: use Gamma.
A reliable order is Offset or Gain for the overall balance, then Lift to clean the blacks, then Gamma for any midtone cast left over. The white balance chapter covers the slider route; the wheels earn their place when the cast is not a simple colour of light.
 (enlarge image)
Gain towards orange changes the top of the Parade; Lift towards teal changes the bottom.
Log wheels: Shadow, Midtone and Highlight
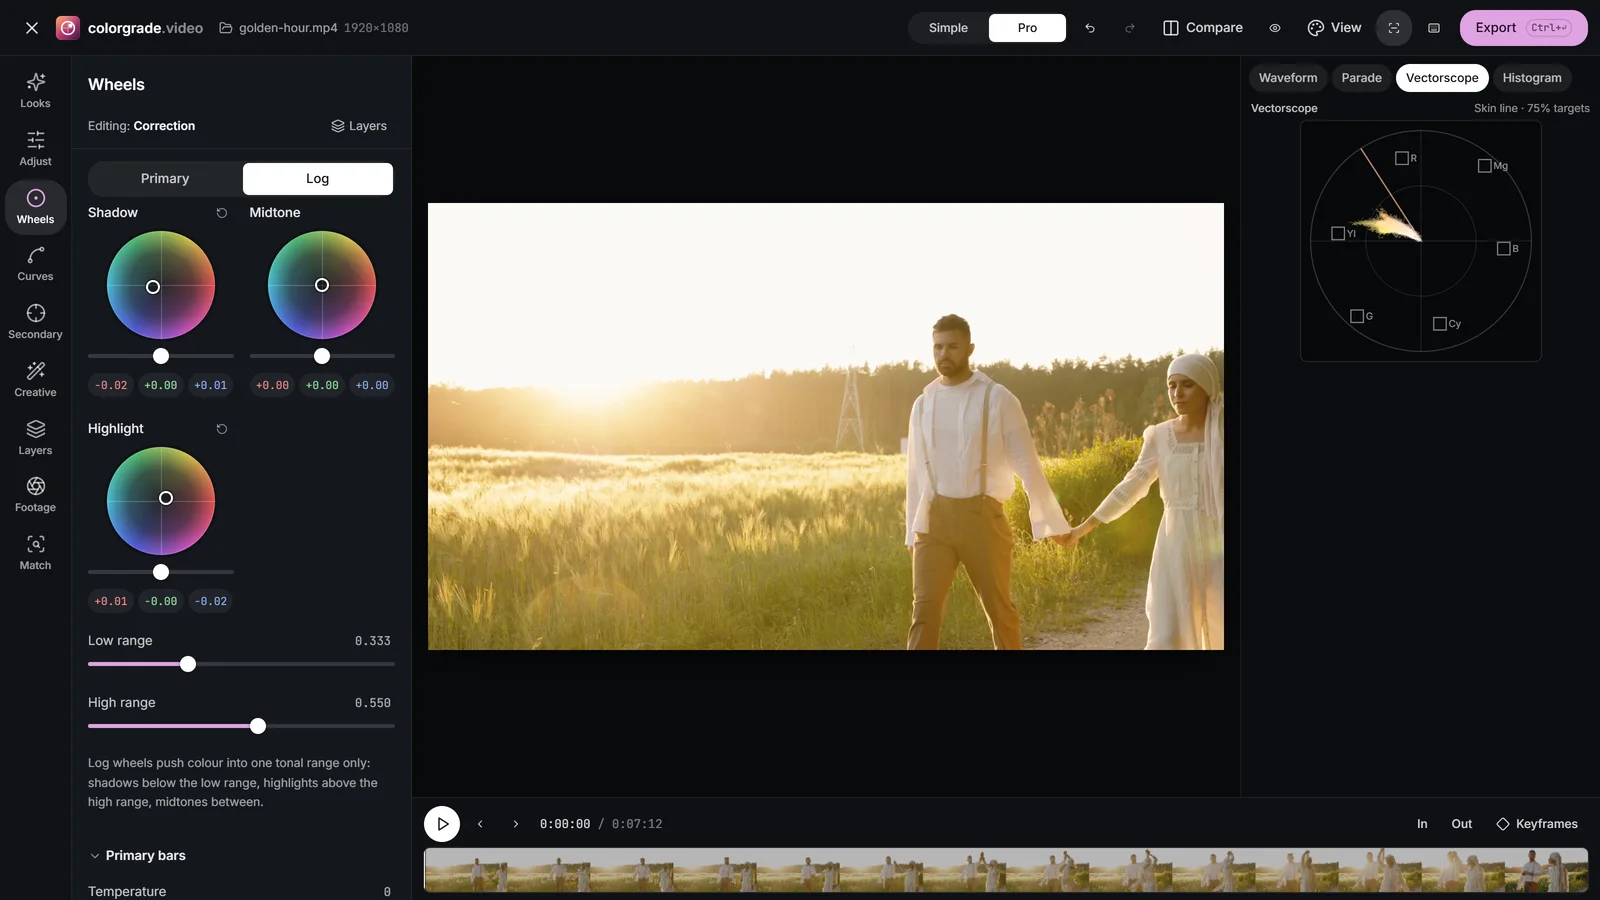
The primary wheels overlap heavily: Lift affects everything except pure white and Gain everything except pure black, so a push on one changes the tones the other is supposed to own. The Log tab offers a different model. Its Shadow, Midtone and Highlight wheels each add an offset only within their own tonal band, and two sliders set where the bands meet: below Low range (0.333 by default) is Shadow, above High range (0.550) is Highlight, and the Midtone wheel covers the levels between. The edges are softened so there is no visible seam.
Because the bands barely overlap, log wheels are the precise choice for colour aimed at one range:
- Cool the shadows and warm the upper tones for a teal and orange split without the two pushes cancelling each other in the middle.
- Shift only the midtones, where most skin sits, without touching black or white.
- Lower Low range so a shadow tint touches only the deepest tones, or raise High range to keep a highlight push away from faces.
They were designed for grading log footage, where tones are spread evenly across the signal, which is where the name comes from. They work equally well after a conversion to Rec.709; convert first, as the log footage and LUTs chapter explains. Use the primary wheels for broad balance and the log wheels for targeted colour.
 (enlarge image)
The Log wheels with Low range and High range at their defaults.
The primary bars
Below the wheels sit sliders that complete the primary grade:
- Temperature and Tint: the white balance controls, repeated here so you don’t have to switch panels.
- Contrast and Pivot: a straight-line stretch around a chosen level. Contrast runs from 0.00 to 2.00 (default 1.00) and Pivot sets the level that stays fixed (default 0.435). The contrast and tonal range chapter explains how it differs from the S-curve in Adjust.
- Mid detail: local contrast measured over a large radius in the midtones. Positive values add punch and texture to landscapes and fabric; on faces, keep it low or use negative values to soften.
- Colour boost: saturates muted colours and leaves already-vivid ones nearly alone; negative values calm the most saturated colours first. It is gentler than Saturation for bringing life into a dull shot. The saturation page compares the options.
- Hue rotate: turns every hue around the colour circle by up to 180°. A few degrees can tidy a whole shot; large values are a stylised effect.
What Premiere Pro and DaVinci Resolve call them
The same ideas appear under different names in other editors, and the maths behind similarly named controls is not always identical, so treat this as a map rather than an exact equivalence:
| colorgrade.video | Premiere Pro (Lumetri) | DaVinci Resolve | Final Cut Pro |
|---|---|---|---|
| Lift | Shadows wheel | Lift (Primaries, Color Wheels) | Shadows |
| Gamma | Midtones wheel | Gamma | Midtones |
| Gain | Highlights wheel | Gain | Highlights |
| Offset | No direct wheel | Offset | Master (closest) |
| Log: Shadow, Midtone, Highlight | None | Primaries, Log | None |
| Low range, High range | None | Low Range, High Range | None |
In Premiere Pro the three wheels live in Lumetri’s Color Wheels & Match section; Resolve shows Lift, Gamma, Gain and Offset in its Primaries palette, with the Log wheels as a separate mode. A grade built here translates to either by moving the matching wheels in the same directions. The DaVinci Resolve guide walks through its Color page.
Grade with Lift, Gamma, Gain and Offset
Use the colour wheels to set levels and balance, then add a split between cool shadows and warm upper tones, watching the waveform and parade.
- 1
Open the clip with the scopes
Choose Open video or photo, switch to Pro, open Wheels on the Primary tab, and show Waveform and Parade.
- 2
Set the levels with the master rings
Use the Lift master ring to place black near 0% and the Gain master ring to place white, then the Gamma ring to set the midtones.
- 3
Balance on the parade
Where the traces separate over a neutral area, push the puck of the matching wheel the opposite way: Gain for the top, Lift for the bottom, Offset for everything.
- 4
Add a creative split
Switch to the Log tab and push Shadow a little towards teal and Highlight a little towards orange. Adjust Low range and High range to move the boundaries.
- 5
Finish with the bars and compare
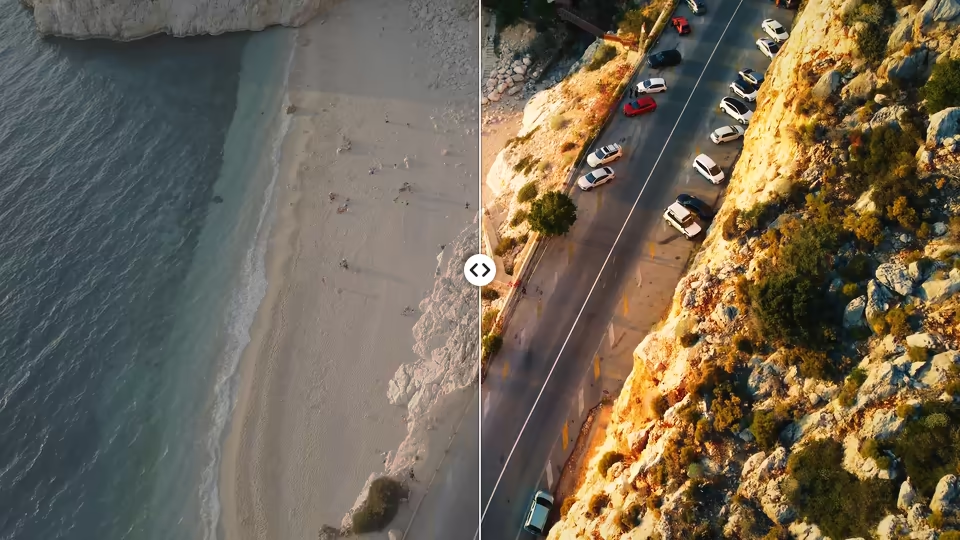
Add Colour boost if colours look dull, then set Compare to Split to check the grade against the original.
Drop a video or photo to colour gradeChoose a video or photo to grade
Opens in the studio: looks and Auto colour for a quick result, wheels, curves, masks and scopes when you want more.It opens in the studio on your phone. Nothing is uploaded.
MP4, MOV, WebM, MKV, JPG, PNG, WebP
Free · no watermark · graded on your device, never uploaded