Are these LUTs really free?
Yes. There is no account, no email sign-up and no paid tier. Preview a look, export the .cube and use it in your own work.
Free · runs in your browser
Every look in the gallery was designed here, previews on a frame of your own footage, and downloads as a standard .cube file you are free to use in your own work.
These free LUTs for video are our own: around 300 original looks, previewed live on a frame of your clip and each downloadable as a .cube file with Export .cube (Shift+L). You choose 33 or 65 points under LUT size, the file is generated in your browser, and you can use it in your own work in DaVinci Resolve, Premiere, Final Cut Pro, CapCut desktop and other editors that read .cube.
They are not repackaged camera LUTs, film-stock copies or someone else’s paid pack. Each look is built from parameters (balance, curves, split toning, saturation by hue) and named by us, so we can offer it freely. Camera conversion LUTs belong to the camera makers, so for those we point you to the official download pages instead, listed below. To use a LUT you already have, see apply a LUT to video.
Choose Select video and open a typical shot. The All looks gallery opens over it, and every thumbnail is rendered on your own frame, so you judge each look on your footage rather than on a demo image.
Search (for example teal, film or black and white), or tap a category chip such as Cinematic, Film stocks, Vintage or Black & white. Arrow keys step through the looks; F marks one as a favourite.
Drag Intensity until it feels right, then choose Done. The strength you pick is what goes into the file, so a look at 60% exports as a 60% LUT.
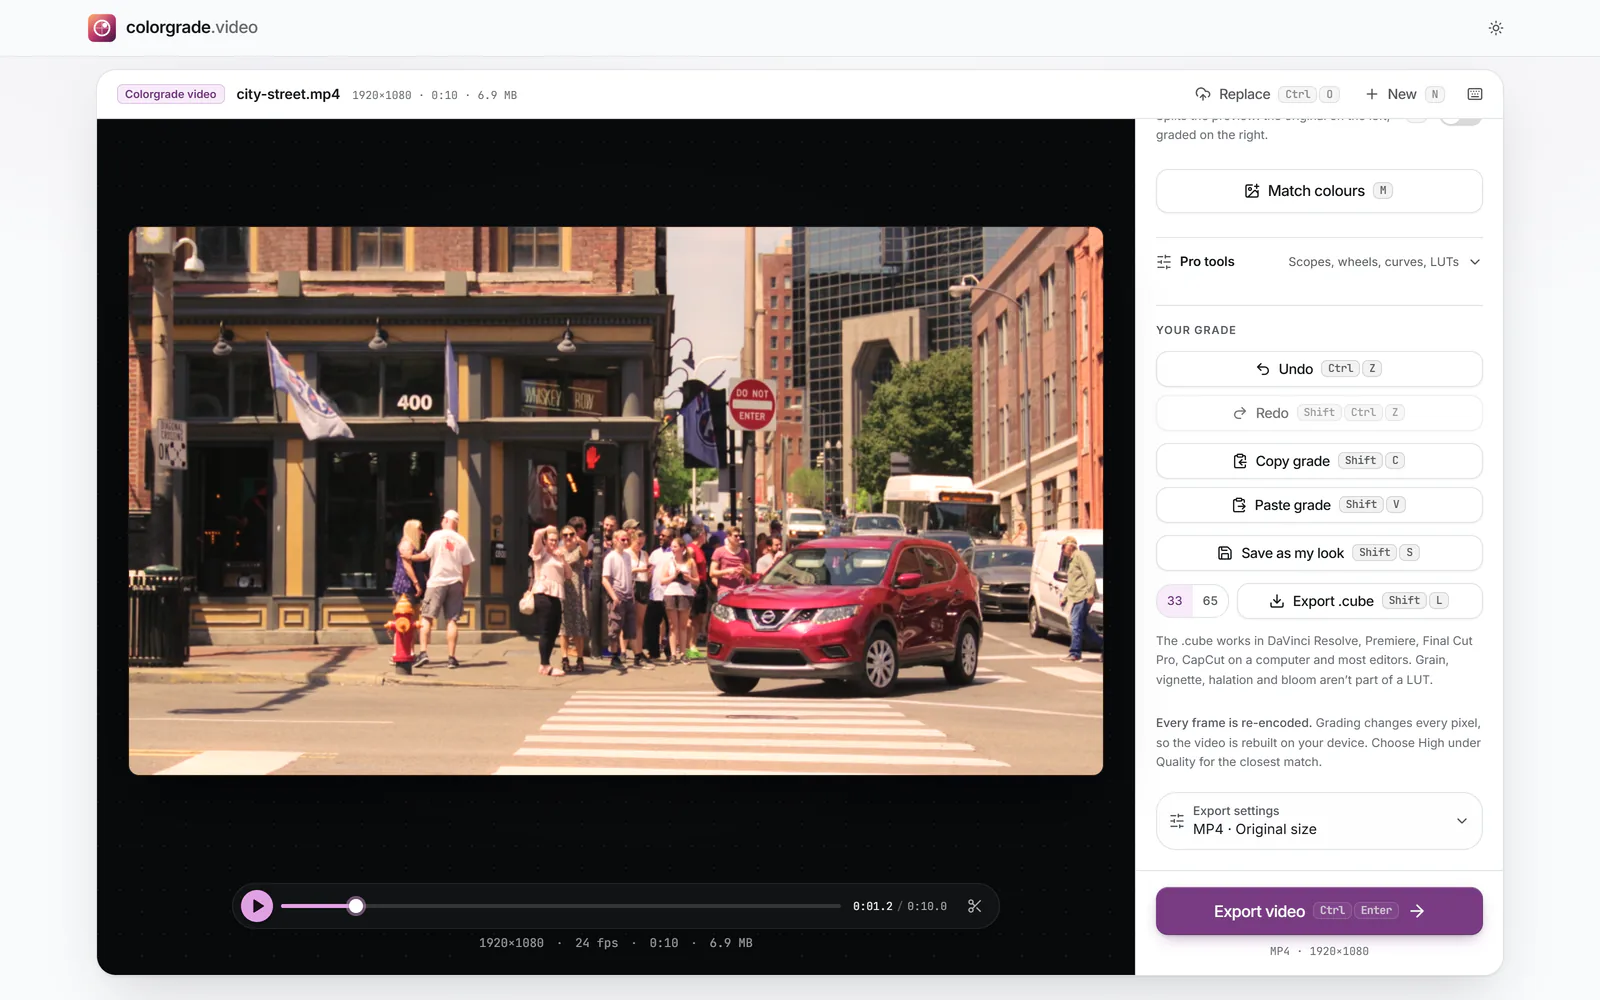
Choose Export .cube (Shift+L) and pick 33 or 65 under LUT size. The file is generated on your device and downloads straight away.
 (enlarge image)
Choose 33 or 65 points, then Export .cube.
The gallery groups the looks under these chips: Natural, Cinematic, Teal & orange, Moody, Film stocks, Vintage, Warm, Cool, Pastel, Black & white, Sepia & duotone, Matte, Bleach bypass, Cross-process, Night, Nature, Underwater, Food, Wedding, Travel, Social and Colour splash. A few to start with: Feature Film for a restrained movie grade, Blockbuster for teal shadows and warm skin, Studio Negative for a filmic negative-and-print feel, Classic Mono for black and white, and Neutral Clean when you only want tidier colour.
Because the looks are parametric rather than copied, none is named after a film brand, and none claims to reproduce one exactly. They are designed to sit on correctly balanced Rec.709 footage, which is what phones and most cameras record unless you switch on a log profile.
Export .cube saves whatever is in Your grade, not just gallery looks. Build something with Wheels, Curves and HSL, and you can take it into your editor as a LUT, or keep it in this browser with Save as my look (Shift+S). One caution: if you pressed Auto colour or used Pick white, that clip-specific balance is part of the grade and will be baked into the file. Reset those first if you want a look you can reuse on other footage.
The number is how many grid points sit along each edge of the colour cube. A 33-point file holds 35,937 colour entries and is the size almost every editor and camera monitor expects. A 65-point file holds 274,625, about seven and a half times as many, so the text file is correspondingly larger and slower to load.
On the Color page, apply the LUT to a node: the usual routes are right-clicking the node and choosing LUT, or dragging it from the LUTs browser onto the node (check the wording in your version). To make a LUT appear in those lists, open Project Settings > Color Management > Lookup Tables, choose Open LUT Folder, copy the .cube in, then click Update Lists. Put the look on a node after any colour space conversion, so it receives Rec.709.
In version 26.x, open Window > Lumetri Color. A creative look belongs in Creative > Look, which has its own Intensity slider; Basic Correction > Input LUT is meant for technical conversion LUTs. To have a LUT listed permanently, Adobe’s help says to copy it into the Creative subfolder of the LUTs folder: on Windows that is C:\Users\<user>\AppData\Roaming\Adobe\Common\LUTs, and on a Mac ~/Library/Application Support/Adobe/Common/LUTs. Adobe has announced that the Lumetri Color panel retires in Premiere 27.0, with the Lumetri effect edited in the Properties panel instead, so check where your version puts it.
CapCut’s own guide puts custom LUT import under Adjustment > LUT > Import, accepting .cube and .3dl, with a slider to set the strength. CapCut doesn’t say on its plan comparison page whether this needs Pro, so it may in your region or version. Its pages don’t describe LUT import in the mobile app.
A LUT changes each pixel’s colour on its own, with no idea where the pixel is or what surrounds it. That is why Grain, Vignette, Halation and Bloom from the Effects tab are never included in an exported .cube: grain is random texture, a vignette depends on position, and halation and bloom spread light into neighbouring pixels. Add those in your editor, or export the finished video from here with Export video, which does include them.
Log conversion LUTs are a different matter: they are published by the camera makers, and none of their download pages that we checked states redistribution terms, so we link rather than host. Official sources: Sony, Panasonic LUMIX, Fujifilm, DJI, GoPro and Nikon; Canon lists its LUTs on each camera’s support download page. Many log profiles are also built into this tool: see log to Rec.709.
Yes. There is no account, no email sign-up and no paid tier. Preview a look, export the .cube and use it in your own work.
No. Every look was designed here from adjustable parameters and named by us. The Film stocks category is inspired by the general behaviour of negative and print film, not a measurement of any branded stock.
33 suits nearly everything and is the most widely accepted size. Choose 65 for extreme looks or smooth gradients where you want the closest possible match to the preview.
Usually because the preview also included spatial effects (Grain, Vignette, Halation or Bloom) that a LUT cannot store, or because your editor changes the colour space before the LUT runs. Feed the LUT normal Rec.709 footage for the closest match.
Convert the footage first. The looks expect normal video, so in your editor place a camera conversion LUT or colour space transform ahead of the look. In this tool, pick your profile in the Footage menu on the Basic tab and the conversion happens before the look.
Yes. Export .cube saves the current grade, whatever you built it from. Reset Auto colour or Pick white adjustments first if you want a look that suits other clips, not just this one.
From the camera maker: Sony, Panasonic, Fujifilm, DJI, GoPro, Nikon and Canon all publish conversion LUTs on their own support sites, linked above. We don’t mirror them.