What is log footage?
Video recorded with a logarithmic tone curve, which spreads the camera’s full range of light across the file instead of shaping it for display. It keeps more room for grading but looks flat and grey until it is converted.
Free · runs in your browser
Choose your camera’s log profile and the flat, grey recording becomes normal-looking video, ready to grade or export. For profiles we don’t build in, load the maker’s own LUT instead.
To convert log footage to Rec.709, open the clip above and choose your camera’s profile in the Footage menu at the top of the Basic tab, for example S-Log3 / S-Gamut3.Cine or V-Log / V-Gamut. The flat, grey picture turns into normal-contrast colour straight away, and a Log exposure slider appears so you can trim the result in stops. It all runs in your browser and the file never leaves your device.
Apple Log from an iPhone has its own walkthrough on the Apple Log to Rec.709 page. DJI D-Log M, GoPro Log, Samsung Log and Apple Log 2 are not in the menu, because their makers haven’t published the maths; for those, load the maker’s conversion LUT on the LUT tab with Apply LUT set to Before the grade. Either way, once the footage is in Rec.709 you can correct and grade it like any other clip.
Choose Select video. Pro tools opens on Basic, with the Footage menu highlighted and set to Standard video (Rec.709).
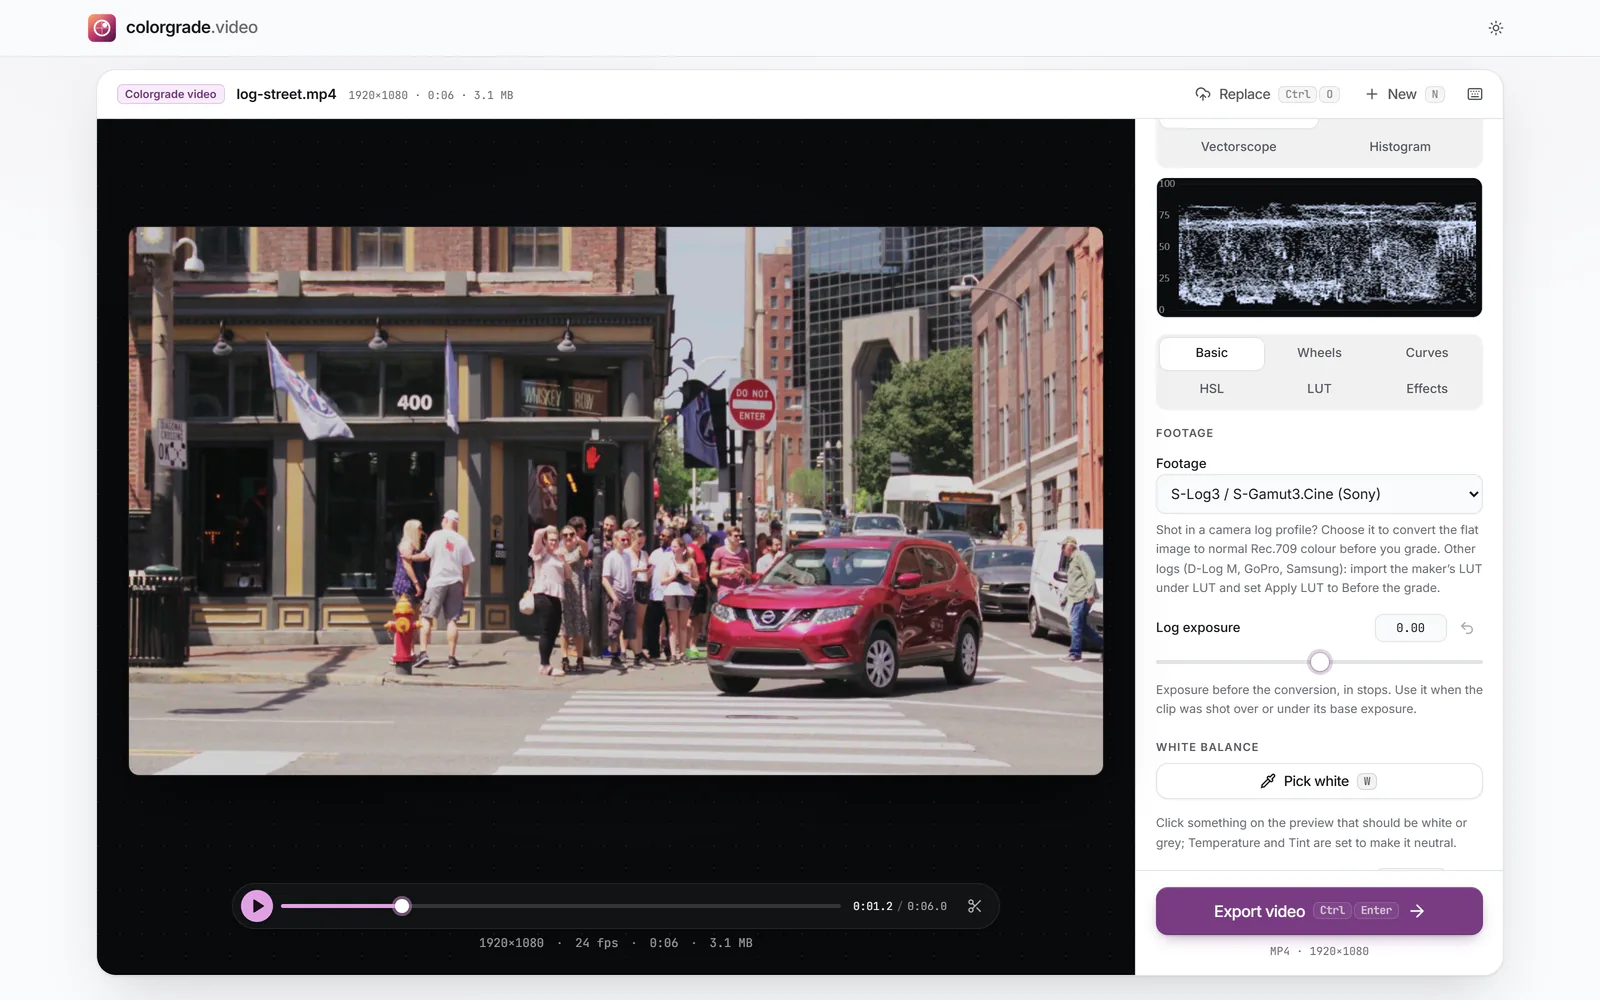
Pick the matching entry in Footage. Match both halves of the name, the log curve and the gamut, to the camera setting; S-Log3 shot in S-Gamut3.Cine and in S-Gamut3 need different entries.
 (enlarge image)
Choose your camera’s profile in the Footage menu; Log exposure appears underneath.
If you exposed brighter or darker than the camera’s reference, as many shooters do with log, move Log exposure by the same number of stops so mid-grey lands where it should.
Press Auto colour (A) for a neutral balance, or choose a look in All looks (L). Both act on the converted picture, so they behave as they would on standard video.
Choose Export video, then Download video. Compare with Before and after (B) first if you want to see how much the conversion changed.
A modern sensor can capture twelve or more stops between the deepest shadow and the brightest highlight that still hold detail. A normal video file and the screen showing it are designed around far less. Log recording solves the mismatch by spacing its code values roughly evenly per stop, so shadows and highlights both get a fair share of the file. The price is that nothing in the file is encoded for display: mid-grey sits higher than usual, blacks are lifted, whites are pulled down, and the picture looks low in contrast.
Most log profiles also record in a wide gamut, such as S-Gamut3 or V-Gamut, whose red, green and blue primaries lie well outside those of standard video. Shown on an ordinary screen without conversion, those primaries are read as if they were Rec.709 ones, so every colour looks pale. That is two problems, tone and gamut, which is why a proper conversion has to deal with both.
For each profile, the tool undoes the log curve using the formula the camera maker published, turning the code values back into scene light. It then converts the wide-gamut primaries to Rec.709 primaries with a colour matrix, and finally applies a neutral display rendering: a tone curve with a soft roll-off into the highlights, followed by standard BT.709 encoding. That last stage is our own design. It is not the manufacturer’s LUT, so the result will be close to, but not identical with, a maker’s look such as Sony’s s709 or Canon 709. If you need that exact look, import the maker’s LUT instead.
DJI D-Log M, GoPro Log, Samsung Log and Apple Log 2 aren’t in the list, because their curves and gamuts aren’t published in a form we can implement faithfully. Choosing a near neighbour, such as D-Log for D-Log M footage, gives colours that look plausible but are wrong. Instead, download the maker’s conversion LUT, choose Import LUT on the LUT tab, and set Apply LUT to Before the grade, leaving Footage on Standard video (Rec.709).
Official pages, linked rather than mirrored: Sony LUT library, Panasonic V-Log, Fujifilm 3D LUTs, DJI LUTs, GoPro Log LUTs and Nikon N-Log 3D LUT. Canon publishes its LUTs on each camera’s support download page.
Video recorded with a logarithmic tone curve, which spreads the camera’s full range of light across the file instead of shaping it for display. It keeps more room for grading but looks flat and grey until it is converted.
The international standard (ITU-R BT.709) for HD video. It defines the red, green and blue primaries, the white point and the transfer curve that ordinary screens, players and platforms expect, so converting log to Rec.709 makes it display correctly everywhere.
Yes, or an equivalent conversion. Creative looks are designed for Rec.709 input. Here, choose your profile in Footage, or import the maker’s LUT with Before the grade, then add a look from All looks or a creative LUT on top.
S-Log3 (S-Gamut3.Cine and S-Gamut3), V-Log, Canon Log, Canon Log 2 and Canon Log 3, F-Log and F-Log2, ARRI LogC3, Apple Log, N-Log and D-Log. For D-Log M, GoPro Log, Samsung Log and Apple Log 2, load the maker’s conversion LUT on the LUT tab.
CapCut’s guides describe importing a .cube or .3dl LUT on desktop under Adjustment > LUT > Import, so you can load the camera maker’s conversion LUT there. CapCut doesn’t state whether LUT import needs Pro, and its pages don’t document LUT import in the mobile app.
Each maker’s LUT includes that maker’s taste in contrast and colour. Our conversion uses the published log curve and gamut, then a neutral rendering of our own design. Import the maker’s LUT if you need its exact look.
No video colour change can be. Every frame is decoded, converted and encoded again. Choose High under Quality in Export settings to keep as much of the original as possible.