Chapter 11 of 13 · Advanced · 10 min read
Delivering a Grade: Rec.709, sRGB and Gamma 2.4
Delivery is the last step of a grade and the one most likely to undo it. A video file doesn’t store how your picture looked on your screen. It stores numbers, plus a few tags saying which standard those numbers follow, and every phone, monitor, television and media player turns them back into light in its own way. Most of the surprises people blame on their grade (“it looked fine on my laptop”) happen here.
This chapter explains Rec.709, gamma 2.4 and sRGB, and why one file can look different on three screens. It covers the studio’s Output setting for log and HDR footage, legal and full range in brief, and the three things you can export: the video, a still and the grade itself as a .cube LUT. It ends with a short checklist for checking your work on more than one screen.
Video guide
Rec.709 vs sRGB vs Gamma 2.4: Choose an Output, Export
Chapters
Rec.709, gamma 2.4 and sRGB: one colour space, three curves
Rec.709 (ITU-R BT.709) is the standard for HD video. It defines three things: the red, green and blue primaries, the D65 white point, and a transfer curve. sRGB, the standard for computer screens and the web, uses exactly the same primaries and white point. So a pure Rec.709 red and a pure sRGB red are the same colour; the differences are all in how brightness levels are encoded and displayed.
The BT.709 curve is a camera curve
The curve written into BT.709 is an encoding function: it tells a camera how to turn scene light into code values, roughly a 0.45 power with a short straight segment near black. It was never meant to describe the screen. For years displays simply behaved like the cathode-ray tubes of the day, and that behaviour was only written down in 2011 as BT.1886: a reference display for HD video follows roughly a 2.4 power curve, viewed in a dim room.
The two curves deliberately don’t cancel out. Encoding at about 0.45 and displaying at 2.4 leaves the image with a little more contrast than the scene had, which is what a picture needs to look natural on a modest screen in a dim room. That built-in contrast boost is part of what makes video look like video.
sRGB is for brighter rooms
sRGB was designed for computer monitors in ordinary office light. Its curve works out at about a 2.2 power overall, again with a straight segment near black. Most laptops, desktop monitors and phones aim at something close to sRGB, so the same file usually looks a little lighter and lower in contrast on them, in the shadows especially, than on a gamma 2.4 grading monitor.
| Rec.709 (BT.709 curve) | Gamma 2.4 (BT.1886) | sRGB | |
|---|---|---|---|
| What it describes | Camera encoding | Reference video display | Computer screens and the web |
| Curve | ≈ 0.45 power, linear toe | 2.4 power | ≈ 2.2 overall, linear toe |
| Assumed room | Dim (with a 2.4 display) | Dim | Ordinary room light |
| Primaries and white | Rec.709, D65 | Rec.709, D65 | Rec.709, D65 |
| 18% grey from log, roughly | 41% | 49% | 46% |
Why one file looks different on three screens
- Display curve: a phone or laptop near 2.2 shows shadows and midtones lighter than a TV or monitor set to 2.4.
- Brightness and the room: a phone at full brightness outdoors and a TV in a dark living room change perceived contrast and colour far more than any slider in your grade.
- Picture modes: TV modes such as vivid or dynamic add contrast and saturation, and many TVs warm or cool the white point.
- Phone features: auto-brightness, night-time warm modes and ambient white-point adaptation all shift the picture.
- The player: operating systems and apps read the file’s colour tags and colour-manage video differently.
 (enlarge image)
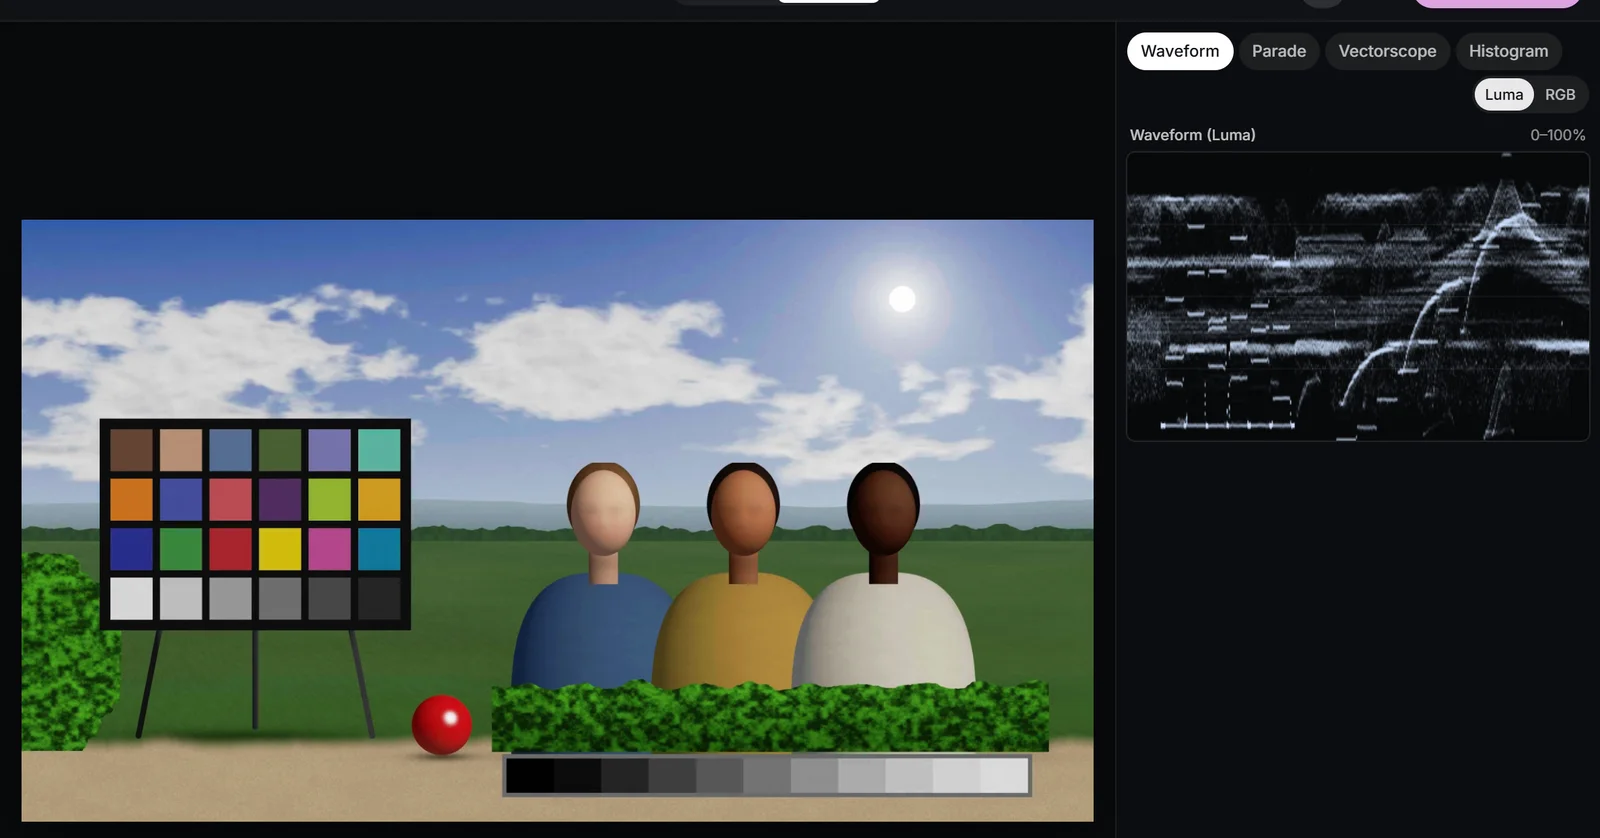
Converted S-Log3 with Output on Rec.709: middle grey sits at about 41% on the Waveform.
The gamma shift problem, and Rec.709-A
The best-known case of a player changing a grade is on Apple computers. Grade on a gamma 2.4 display, export a file tagged as Rec.709, and play it in QuickTime Player or Safari on a Mac: the shadows and midtones often look lighter and the picture flatter than when you graded it. Nothing in the file has changed. Apple’s colour management decodes Rec.709 video with a curve that is lighter than 2.4, close to the inverse of the BT.709 camera curve, so the same numbers are shown differently. Editors call this the gamma shift.
DaVinci Resolve offers an output setting called Rec.709-A for this. It writes different colour tags into the file so that Apple’s players show it the way it looked in Resolve’s viewer on the same Mac. It is a workaround for one viewing path, not a different standard: other players, televisions and many websites ignore the difference, so a file made for Apple’s players can look wrong elsewhere.
There is no setting that makes every screen agree. The practical answer is to decide who will watch, grade with that screen in mind, and check the exported file on it. For most web video, that means phones and laptops, which sit nearer sRGB-style viewing than a dim grading suite.
The studio’s Output setting for log and HDR footage
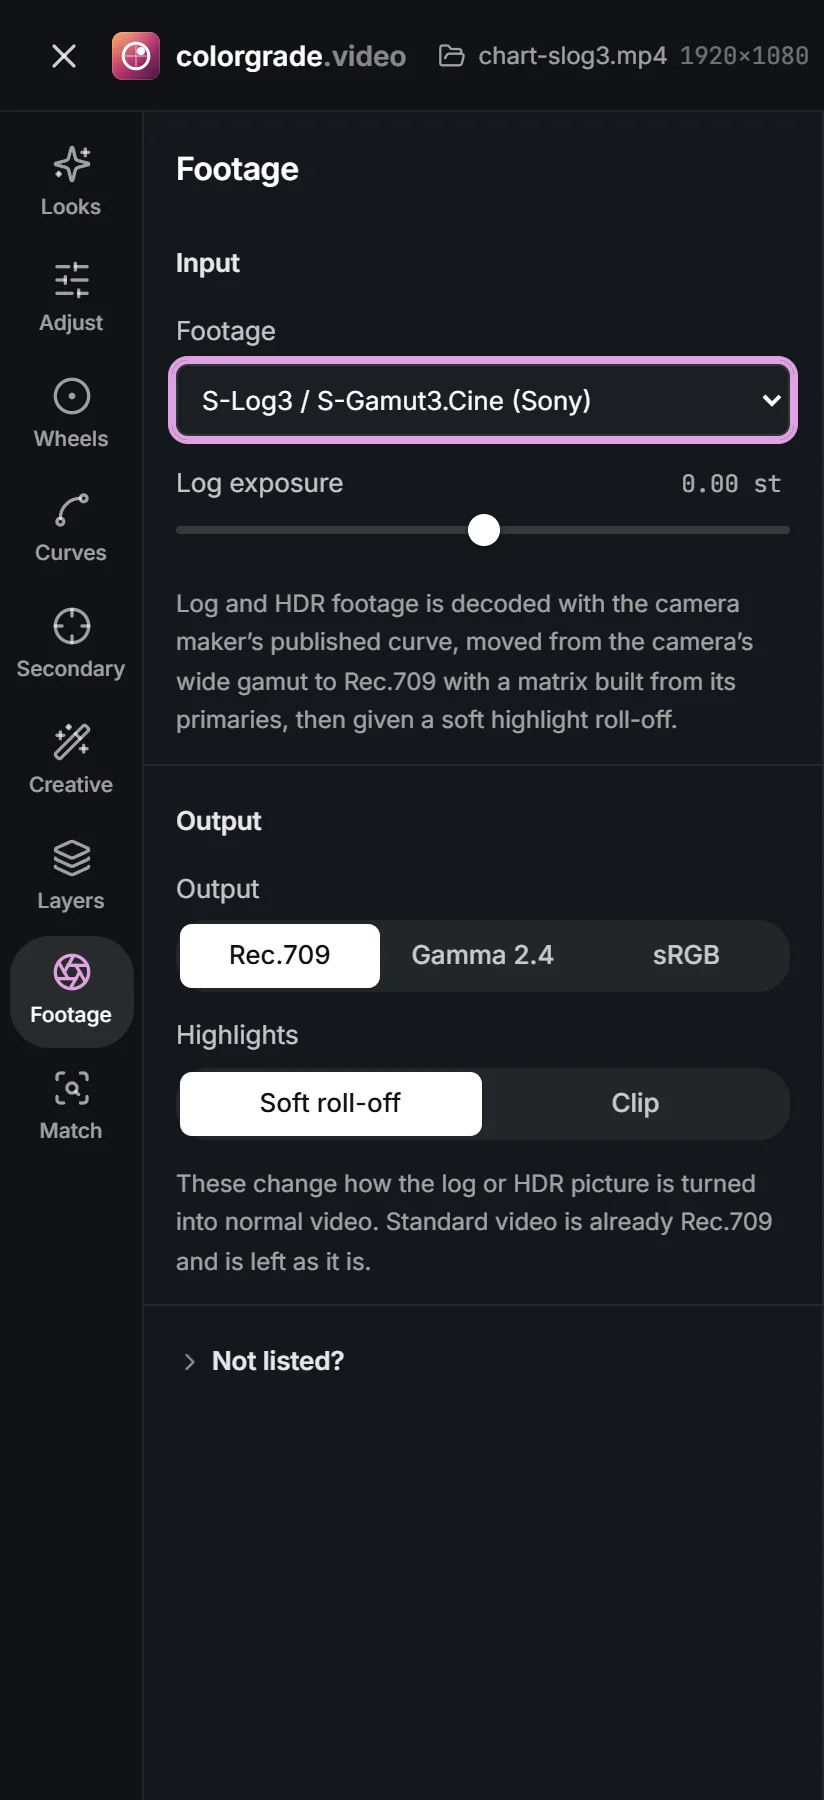
When Footage in the Footage panel is set to a log or HDR profile, such as S-Log3 / S-Gamut3.Cine or HLG (Rec.2100), the studio converts the camera’s curve and gamut to Rec.709 primaries, applies a soft shoulder to the highlights and then encodes the result with the curve chosen in Output: Rec.709 (the BT.709 camera curve, the default), Gamma 2.4 or sRGB. The log footage chapter and the log to Rec.709 page explain the conversion itself.
Watch the Waveform as you switch: with Rec.709, an 18% grey card lands at about 41%; with Gamma 2.4, nearer 49%; with sRGB, about 46%. The two display curves give a lighter, gentler picture because they encode for a display without the extra contrast the camera curve adds.
Which to choose
- Rec.709: the default and the right choice for most delivery. It matches how phones and cameras encode their own video, so converted log clips sit naturally next to ordinary clips in an edit.
- Gamma 2.4: when the rest of a project is converted to gamma 2.4, for example a Resolve timeline whose Color Space Transform outputs Gamma 2.4, so the clips agree.
- sRGB: for stills and screen-only work, such as frames for a website or a presentation.
Whichever you choose, choose it once per project. Mixing output curves across clips of the same scene creates exactly the kind of mismatch the shot matching chapter works to remove. HLG and PQ footage is tone mapped to standard dynamic range here; all three output options are standard dynamic range.
 (enlarge image)
The Footage panel’s Output menu: Rec.709, Gamma 2.4 or sRGB.
Legal and full range, briefly
Most video is stored in limited range, also called legal or video range: in 8-bit files black is code 16 and white is code 235, rather than 0 and 255. Full range uses all the codes, as still images do. Each file is tagged with its range, and the player expands limited range back to the screen’s full range when it plays.
Problems appear when the tag and the treatment disagree. A full-range file read as limited looks harsher, with crushed blacks and clipped whites. A limited-range file read as full looks flat, with grey blacks and dull whites. If an export looks like that in one player but fine in others, suspect a range mismatch before you touch the grade.
You rarely set range by hand in a browser export, and the studio’s scopes read 0 to 100% from black to white, so you can grade without thinking in code values. Broadcasters are the exception: they may require legal levels and check them with their own tools, so follow their delivery specification.
Exporting the video
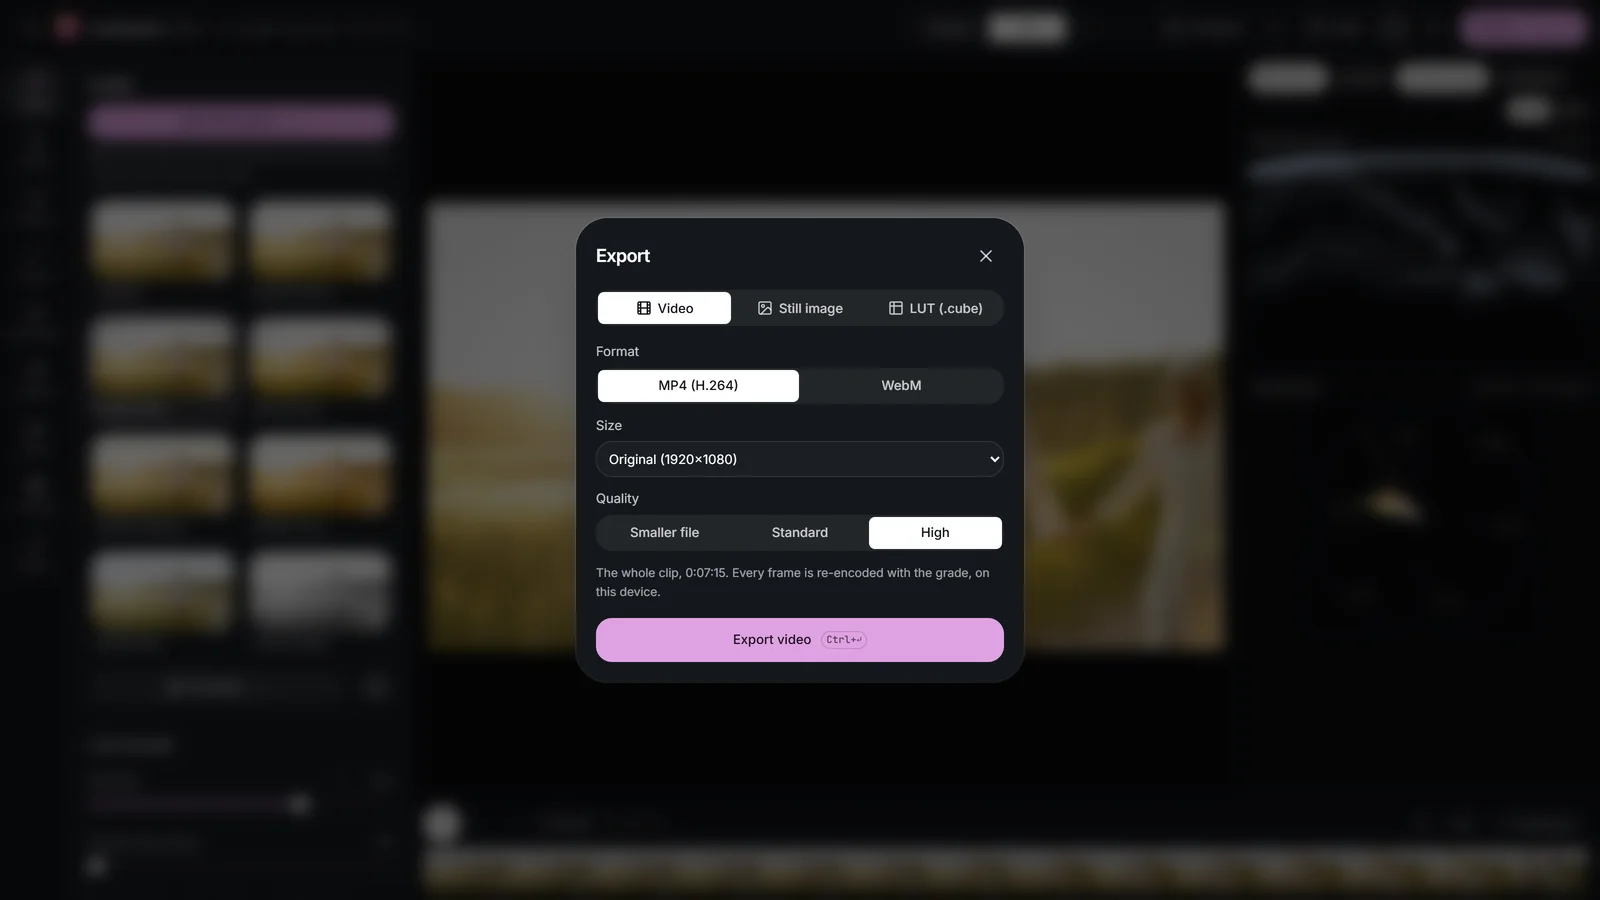
Open Export (Ctrl/Cmd+Enter). The Video tab has Format (MP4 or WebM, where your browser can encode it), Size (Original, 2160p, 1440p, 1080p, 720p or 480p), Quality (Smaller file, Standard or High), Keep sound, and the range set by the In and Out markers on the timeline. Export video renders the clip, then Download video saves it, Share sends it where your device supports that, and Back to the studio returns you to the grade.
Every export is a re-encode
Export video decodes every frame, applies the grade and compresses it again. It is never lossless, so export from your original clip each time rather than re-grading an exported copy: each generation of compression loses a little more fine detail and adds banding to smooth gradients.
Quality is mostly bitrate
Quality decides how much data each second of video may use. More data means fewer compression artefacts, and the first places they appear are the places a grade makes demanding: smooth skies and walls, which band into steps, and grain, which turns into blotchy noise at low bitrate. Choose High for anything a platform will compress again, since social and video sites re-encode every upload, and Smaller file only for quick previews.
- MP4 is the safest Format for sharing and for importing into other editors.
- Keep Size at Original or smaller. Choosing a larger size adds pixels, not detail.
- Strong grain needs High quality; if file size matters more, use less Grain.
 (enlarge image)
The Video tab of Export: Format, Size, Quality and Keep sound.
Exporting a still or a .cube LUT
A still image
The Still image tab saves the frame at the playhead at full resolution as PNG or JPEG with Save image. PNG keeps every pixel exactly and suits thumbnails and references; JPEG is far smaller and fine for sharing. A still is also the quickest way to check a grade on another device: send it to your phone and look at it there.
The grade as a LUT
The LUT (.cube) tab writes your grade as a 3D LUT that other editors, cameras and monitors can load, with Export .cube (Shift+L). A 3D LUT is a grid of sample points through the colour cube: for each input colour on the grid it stores an output colour, and colours between the points are interpolated. LUT size sets the grid.
| LUT size | Grid points | File, roughly | Use it for |
|---|---|---|---|
| 17 | 4,913 | 0.1 MB | Gentle looks; cameras and monitors that only take small LUTs |
| 33 | 35,937 | 1 MB | The usual choice for editors |
| 65 | 274,625 | 7 MB | Steep curves and narrow hue changes |
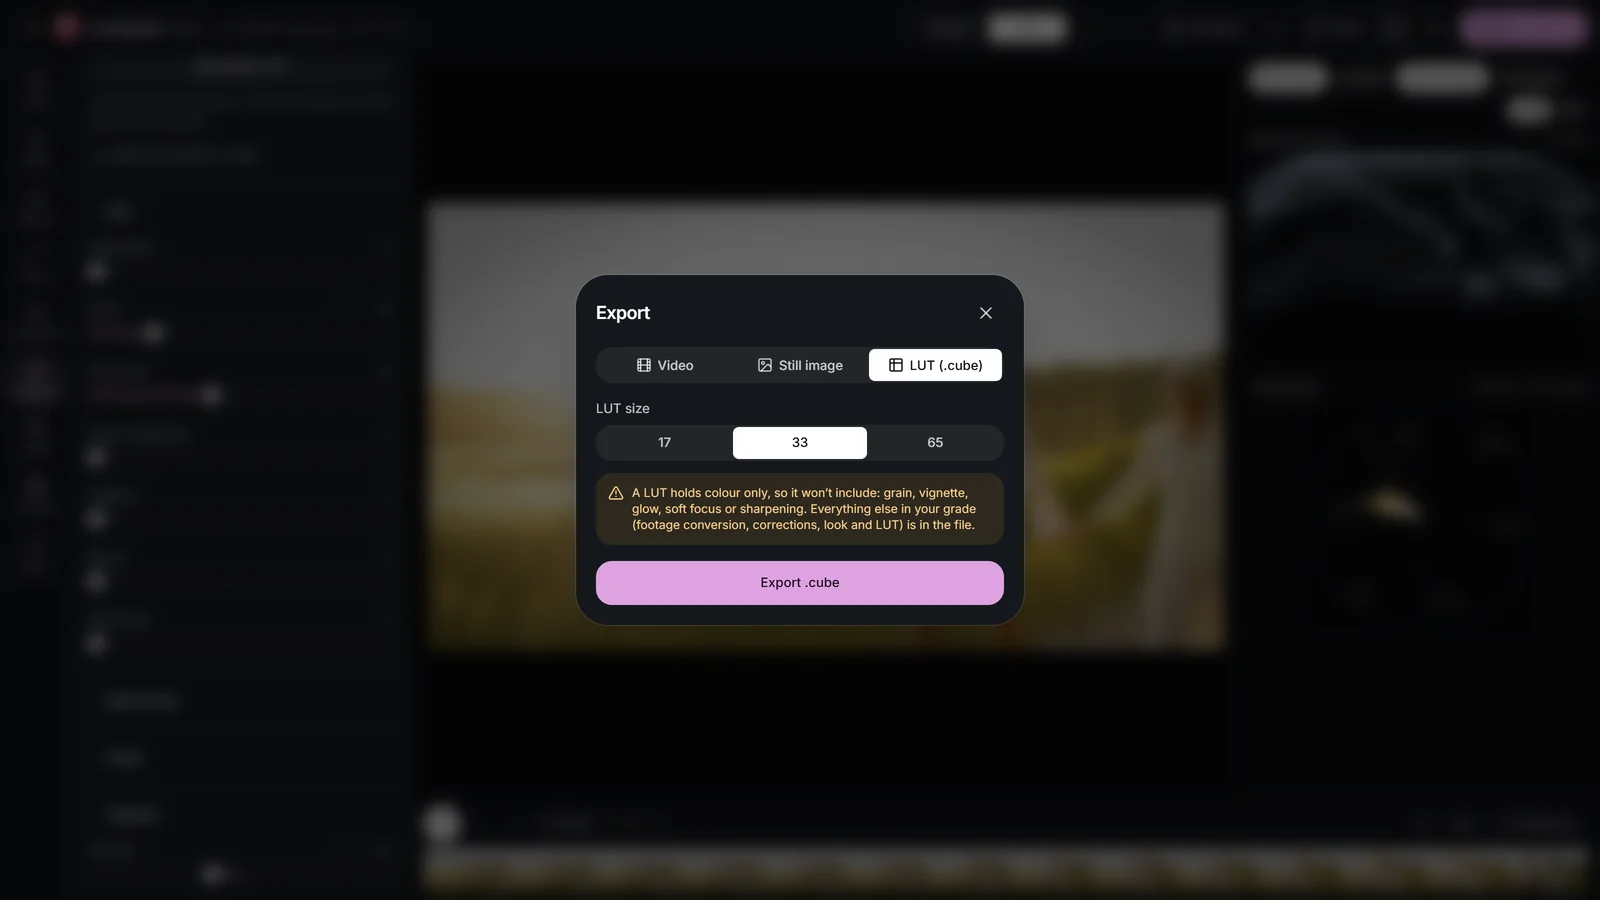
A LUT maps one colour to another, and that is all it can do. Anything that depends on neighbouring pixels, on the position in the frame or on time can’t be stored, which is why the studio warns when your grade contains layers with a mask, grain, vignette, glow, sharpen or keyframes. Those parts are left out of the file. A LUT also only makes sense for the kind of footage it was built on: one made on converted log footage expects the same conversion before it, so note the input in the file name. The apply a LUT page covers loading LUTs here.
 (enlarge image)
The LUT (.cube) tab warns about the parts of a grade a LUT can’t hold.
Check on several screens before you send it
No grade survives every screen unchanged, but it should survive the ones your audience uses. Before you deliver:
- Watch the exported file, not the studio preview, from start to finish.
- Look at it on a phone with auto-brightness and warm night-time modes switched off, then again with them on, as most viewers have them.
- Look at it on a laptop or desktop monitor, and on a television in its standard or film mode if the video is for TV.
- Compare skin and the darkest areas across the screens: those change most.
- If one screen is clearly the odd one out, adjust that screen or its player rather than the grade.
Many delivery problems start earlier in the grade. The mistakes chapter lists the common ones, and the workflow chapter puts delivery in its place at the end of the order.
Try it: convert, choose an output and export
Convert a log clip, compare the three output curves on the waveform, then export the video, a still and the grade as a .cube LUT.
- 1
Open a log clip
Open the clip, switch to Pro and show the Waveform. Log footage looks flat and grey before conversion.
- 2
Convert it
In the Footage panel, set Footage to the camera profile you shot in, such as S-Log3 / S-Gamut3.Cine.
- 3
Compare the output curves
Switch Output between Rec.709, Gamma 2.4 and sRGB and watch the midtones move on the Waveform. Settle on Rec.709 unless your project needs another.
- 4
Export the video
Open Export, choose Format MP4, Size Original and Quality High, then Export video and Download video.
- 5
Save a still and a LUT
On Still image, save a PNG with Save image. On LUT (.cube), choose LUT size 33 and Export .cube.
- 6
Check it elsewhere
Play the exported file on a phone and on a second screen, comparing skin and the deepest shadows.
Drop a video or photo to colour gradeChoose a video or photo to grade
Opens in the studio: looks and Auto colour for a quick result, wheels, curves, masks and scopes when you want more.It opens in the studio on your phone. Nothing is uploaded.
MP4, MOV, WebM, MKV, JPG, PNG, WebP
Free · no watermark · graded on your device, never uploaded